Any red velvet lovers will go crazy for these Red Velvet Whoopie Pies – two soft, cake-like red velvet cookies that are sandwiched with a dreamy, creamy filling. Perfect for snack time, or for any holiday celebration!
If you are a red velvet lover, you’ll also love these red velvet cupcakes and these red velvet gooey butter cookies.

I was recently updating my recipe for Whoopie Pies here on Taste and Tell, which led me to also remaking these Red Velvet Whoopie Pies.
You all know that I love red velvet. I even wrote a whole cookbook about it.
And when I looked over the recipe that was originally posted here, I knew that I needed to change it a bit. So of course, I went to my cookbook and used that recipe, knowing that I already loved them.
I did keep the filling the same as the original recipe here, though. In the cookbook, I went with a marshmallow filling, but these days, I prefer this filling.
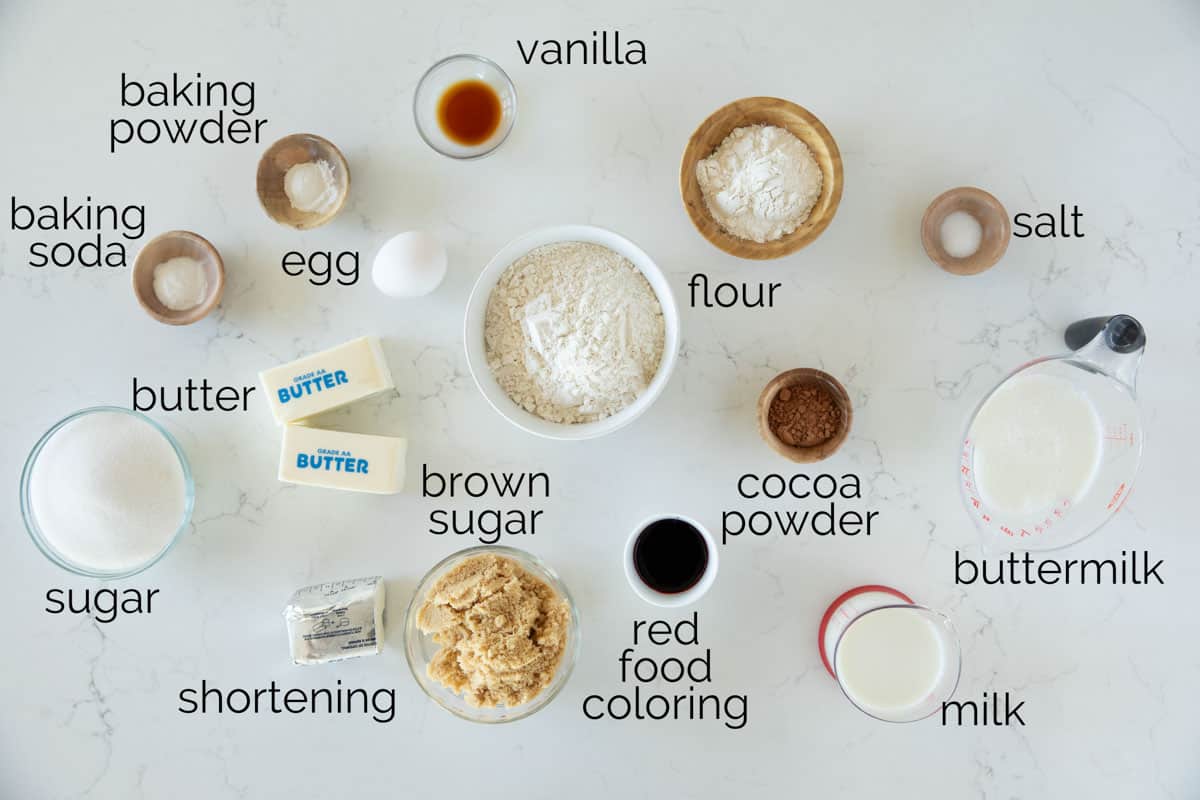
Ingredients
Scroll down to the recipe card at the end of the post for full amounts and instructions.
- Flour: I use all-purpose flour.
- Cocoa Powder: You just need unsweetened cocoa powder. My original recipe only used 1 tablespoon of cocoa powder, but I upped it to 2 tablespoons for this recipe. If you’d like a brighter red color, just use 1 tablespoon of cocoa powder.
- Baking Powder & Baking Soda: Both baking soda and baking powder are needed in this recipe for flavor and for rise.
- Salt: The salt helps to balance the flavors.
- Buttermilk: Not only does the buttermilk give you the tangy flavor that red velvet is so well known for, but it also helps to keep the cookies nice and tender.
- Food Coloring: I tend to use gel food coloring most of the time, but for red velvet, I like to use liquid. It might just be in my head, but I’ve always thought that the food coloring adds to the red velvet flavor. You can swap in gel, though – you’ll just need a lot less.
- Vanilla: The vanilla adds flavor to both the cookies and the filling.
- Butter: I use unsalted butter.
- Sugar: You will need light brown sugar for the cookies, and granulated sugar for the filling.
- Egg: I always use large eggs. Using a room temperature egg is best.
- Shortening: You can use all butter for the filling, but the shortening makes it light and fluffy.
How to Make Red Velvet Whoopie Pies
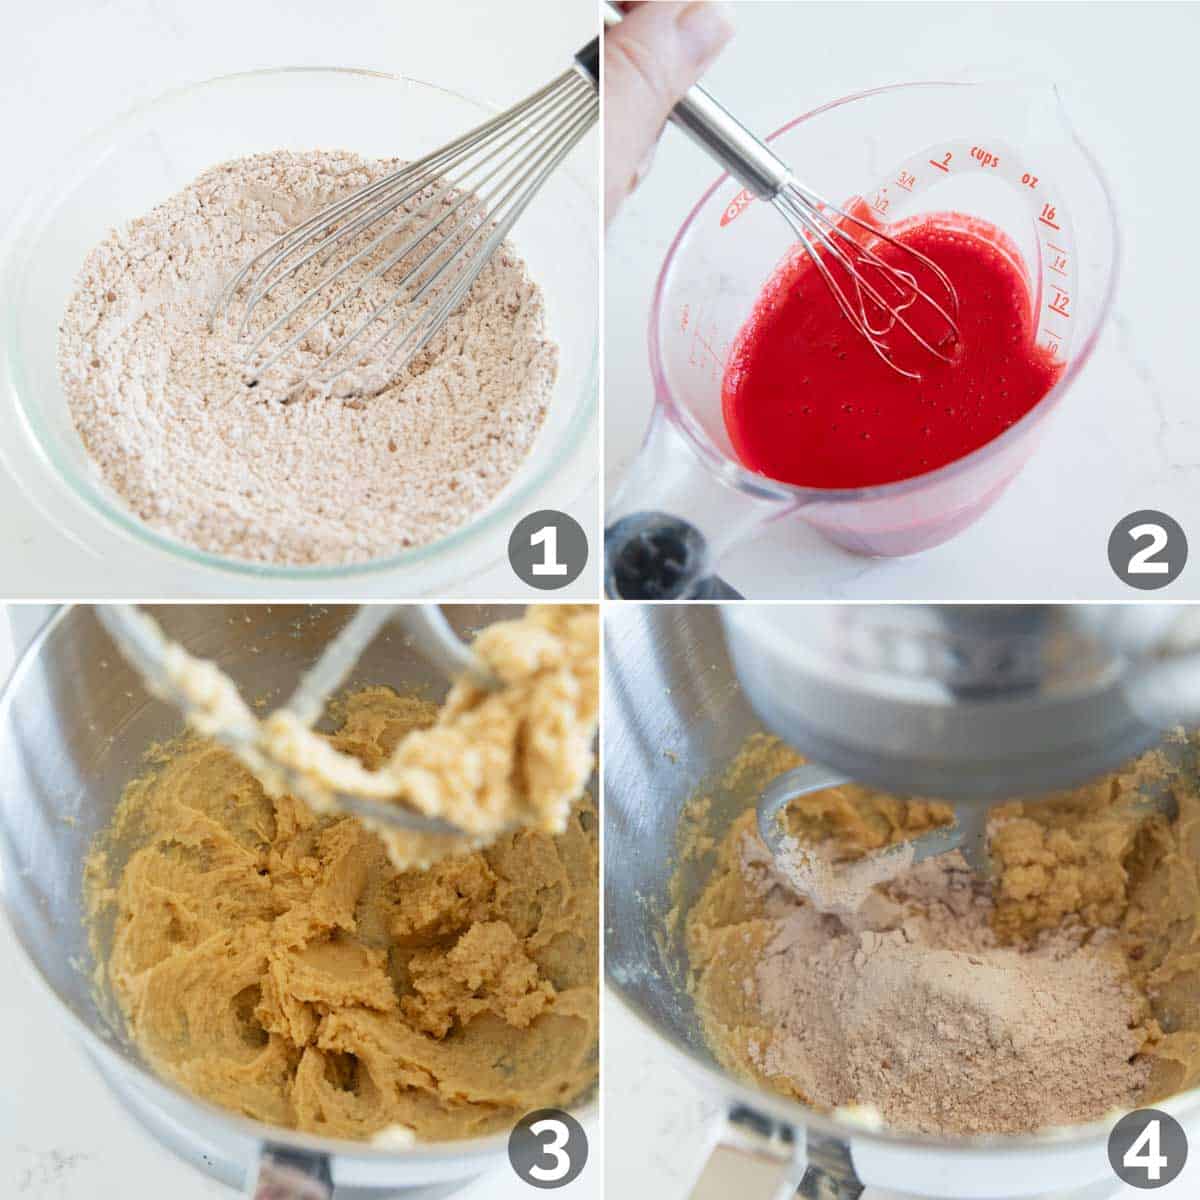
STEP 1: Whisk all of the dry ingredients together.
STEP 2: Combine the buttermilk with the food coloring and vanilla. I like to do this in a liquid measuring cup to save on dishes.
STEP 3: In the bowl of a stand mixer, beat the butter and brown sugar together. You want this light and fluffy, so mix it for several minutes. Then add the egg and mix just until combined. You can also make this in a bowl with a hand mixer.
STEP 4: Add 1/3 of dry mixture to the mixer and mix until combined.
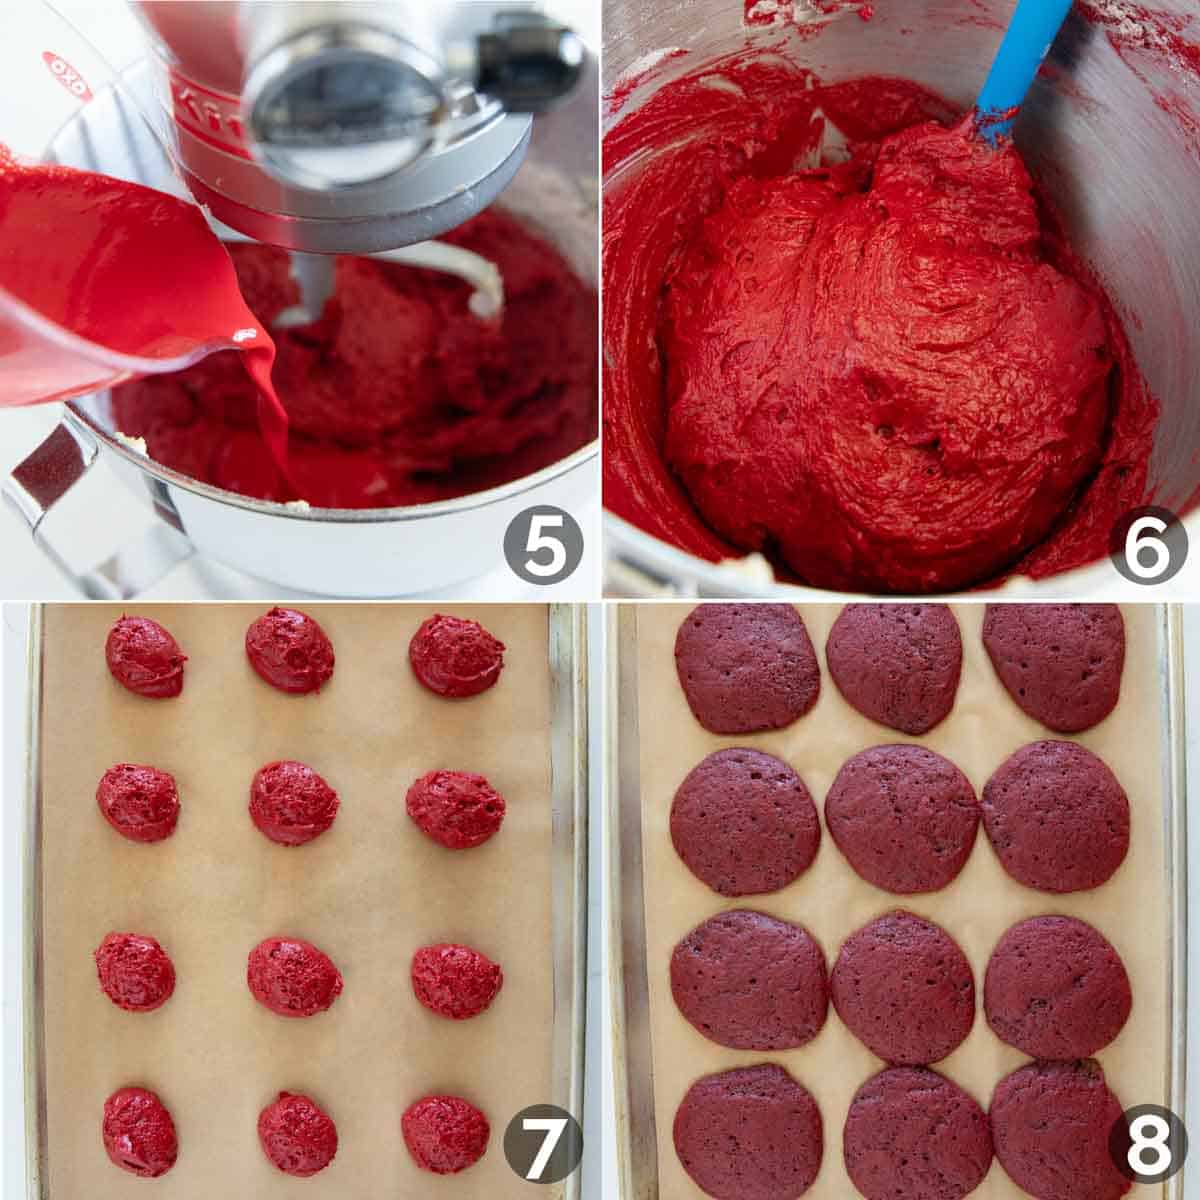
STEP 5: Add in 1/2 of the buttermilk mixture, mixing to combine. Then repeat, adding 1/2 of the remaining flour, then the rest f the buttermilk, and finally the remaining flour.
STEP 6: Use a spatula to make sure everything is mixed in. You don’t want to overmix the batter, but you want to make sure it is fully mixed.
STEP 7: I use a cookie scoop to scoop out the batter onto a parchment lined baking sheet. I use a 2 tablespoon cookie scoop.
STEP 8: Bake the cookies until they are set, then let them cool completely.
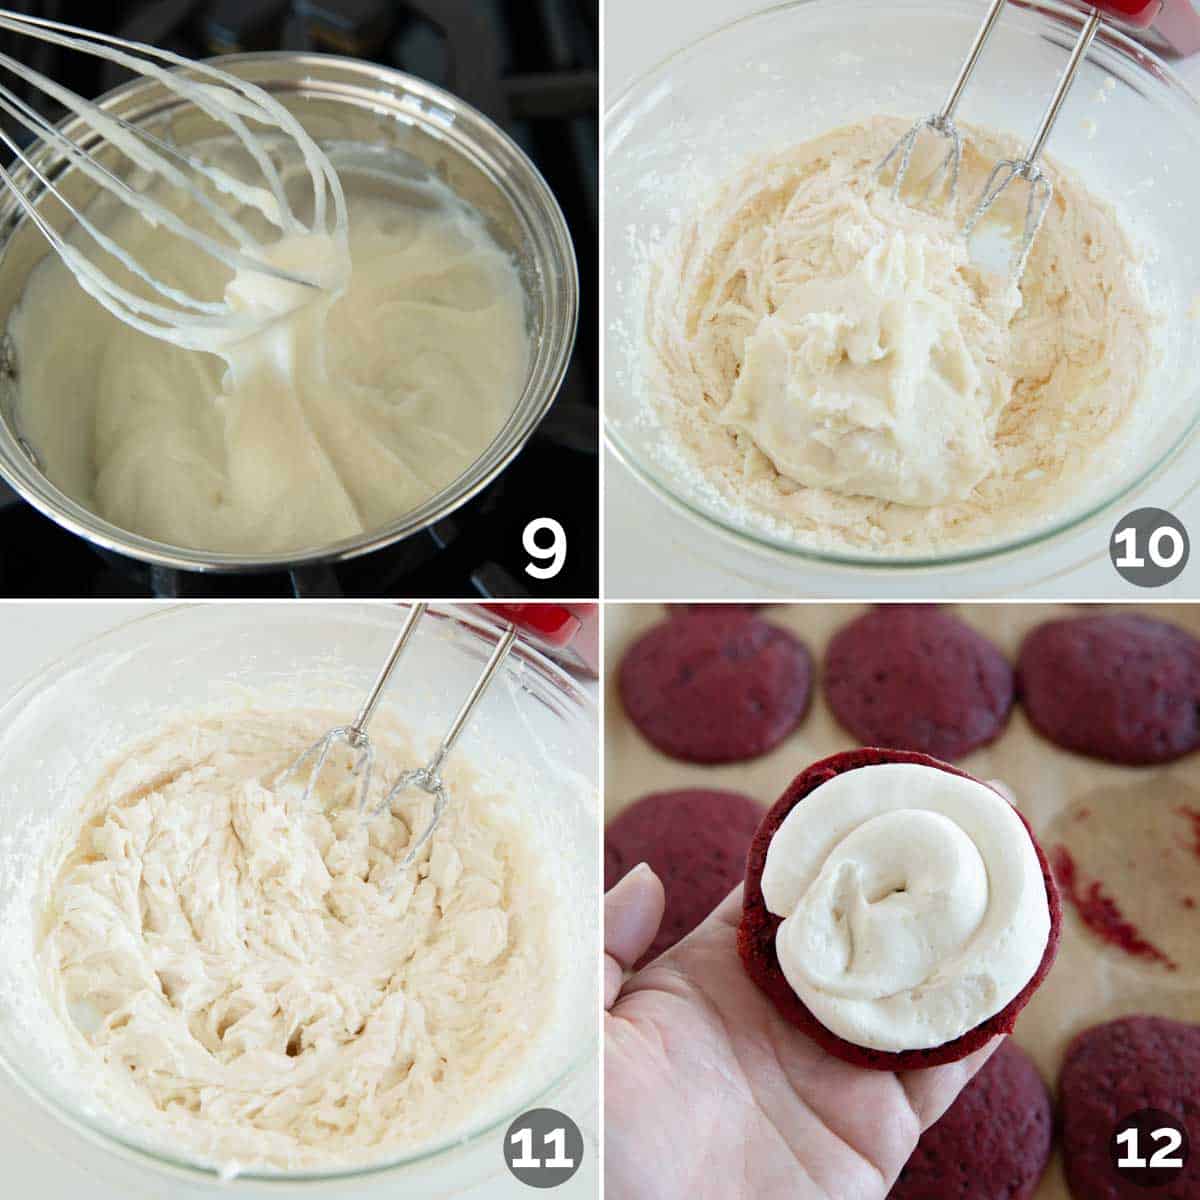
STEP 9: Make the filling by whisking together the milk and flour, and cook it until it is nice and thick. Let this mixture cool completely.
STEP 10:In a bowl, beat the sugar, butter, and shortening until light and fluffy, and then beat in the vanilla. Once the flour mixture is cooled add that in.
STEP 11: Beat this all together until you have a light, fluffy filling.
STEP 12: Transfer the mixture to a piping bag, and refrigerate for 30 minutes to let it set up a bit. Pipe the filling on the flat side of half of the cookies, then top with another cookie.

Tips and Tricks
Make sure all of your ingredients are at room temperature for the best results.
I like to use a cookie scoop for the batter, but the cookies don’t always end up as perfect circles. If you want more control over the shape of the cookies, you can transfer the batter to a piping bag and pipe the batter into circles.
I like to wrap these individually in plastic wrap, and then store them in the refrigerator. You can let them come to room temperature before eating, or you can enjoy them cold!
You can make these red velvet whoopie pies bigger or smaller, but you will need to watch the bake time.

Change it Up
I was tempted to make a cream cheese filling for these cookies, but my husband’s vote won out. And while I do love this cooked frosting filling, if you prefer a cream cheese filling, it would be equally delicious. To make cream cheese filling, simply beat together the following ingredients:
- 8 oz softened cream cheese
- 1/4 cup softened butter
- 2 cups powdered sugar
- 1 teaspoon vanilla extract
- pinch of salt

More Cookie Recipes
Sour Cream Cookies
Cake Mix Cookies
Oatmeal Cookies
Coconut Macaroons
LOOKING FOR MORE FREE RECIPES?
Subscribe to my free recipe newsletter to get new family friendly recipes in your inbox each week! Find me sharing more family-friendly inspiration on Pinterest, Facebook, and Instagram.

Red Velvet Whoopie Pies
Ingredients
Cookies:
- 2 cups all-purpose flour
- 2 tablespoons unsweetened cocoa powder
- 1 teaspoon baking powder
- 1 teaspoon baking soda
- 1/2 teaspoon salt
- 1 cup buttermilk
- 2 tablespoons liquid red food coloring
- 1 teaspoon vanilla
- 1/2 cup butter at room temperature
- 1 cup brown sugar
- 1 large egg
Filling:
- 5 tablespoons all-purpose flour
- 1 cup milk
- 1 cup granulated sugar
- 1/2 cup butter at room temperature
- 1/2 cup solid vegetable shortening such as Crisco
- 1 teaspoon vanilla extract
Instructions
- Preheat the oven to 350ºF. Line 2 baking sheets with parchment paper.
- In a bowl, whisk together the flour, cocoa powder, baking powder, baking soda, and salt.2 cups all-purpose flour, 2 tablespoons unsweetened cocoa powder, 1 teaspoon baking powder, 1 teaspoon baking soda, 1/2 teaspoon salt
- In another bowl, (or I like to use my liquid measuring cup), whisk the buttermilk, food coloring, and vanilla together.1 cup buttermilk, 2 tablespoons liquid red food coloring, 1 teaspoon vanilla
- Place the butter and brown sugar in the bowl of a stand mixer (or use a large bowl with a hand mixer). Cream them together until light and fluffy, several minutes. Add in the egg and mix to combine.1/2 cup butter, 1 cup brown sugar, 1 large egg
- Add 1/3 of the flour mixture and mix until combined. Then pour in half of the buttermilk mixture, and mix again. Continue, adding 1/2 of the remaining flour, the remaining milk, then the remaining flour. Mix just until combined, then remove from the mixer and mix a few times with a spatula to make sure everything is incorporated.
- Use a 2 tablespoon cookie scoop* to scoop the dough onto the prepared baking trays, keeping them at least 2 inches apart.
- Bake, 1 tray at a time, until the cookies are set, about 12-14 minutes.
- Let the cookies cool completely.
- While the cookies and baking and cooling, whisk the flour and milk together in a small saucepan over medium heat. Cook, whisking constantly, until the mixture is thick, about 3 minutes. Remove from the heat and let this mixture cool completely.5 tablespoons all-purpose flour, 1 cup milk
- Once cool, place the sugar, butter, and vegetable shortening in a bowl and beat until fluffy and combined. Beat in the vanilla extract. Add the cooled flour mixture and continue to beat until light and fluffy. The sugar should be dissolved, so if you still fill sugar granules if you rub a bit of filling between your fingers, continue to beat it until smooth.1 cup granulated sugar, 1/2 cup butter, 1/2 cup solid vegetable shortening, 1 teaspoon vanilla extract
- Transfer the mixture to a piping bag** and refrigerate for 30 minutes.
- Turn half of the cookies upside down so that the flat side is up. Pipe the filling onto the flat sides of the cookies, then place another cookie on top, flat side down, to form your whoopie pies.
- Store the cookies covered in the refrigerator.






Loni says
These unfortunately spread all over. I was hoping they would maintain their shape.
Deborah says
I’m so sorry that happened – I’m not sure what went wrong. They shouldn’t spread all over. They might have just needed a little bit more flour.
Leslie says
I made these tonight and they turned out beautifully and are delicious. Instead of using a teaspoon, I used a small cookie scoop. I liked the filling but like you prefer cream cheese icing. I think I'll try it with the icing next time I make these. Thanks for sharing the recipe.
Jean Bugs says
Good Lord I love a good Whoopie pie! And good Lord I love Red Velvet! I think I’ve died and gone to heaven with the two together!!!! And when you put the true filling in them like this recipe has, well I just can’t even describe my level of euphoria!!!!
Kim says
Your whoopie pies are too cute! Haven’t had red velvet cake in ages.
Clements Family says
Looks delish!!