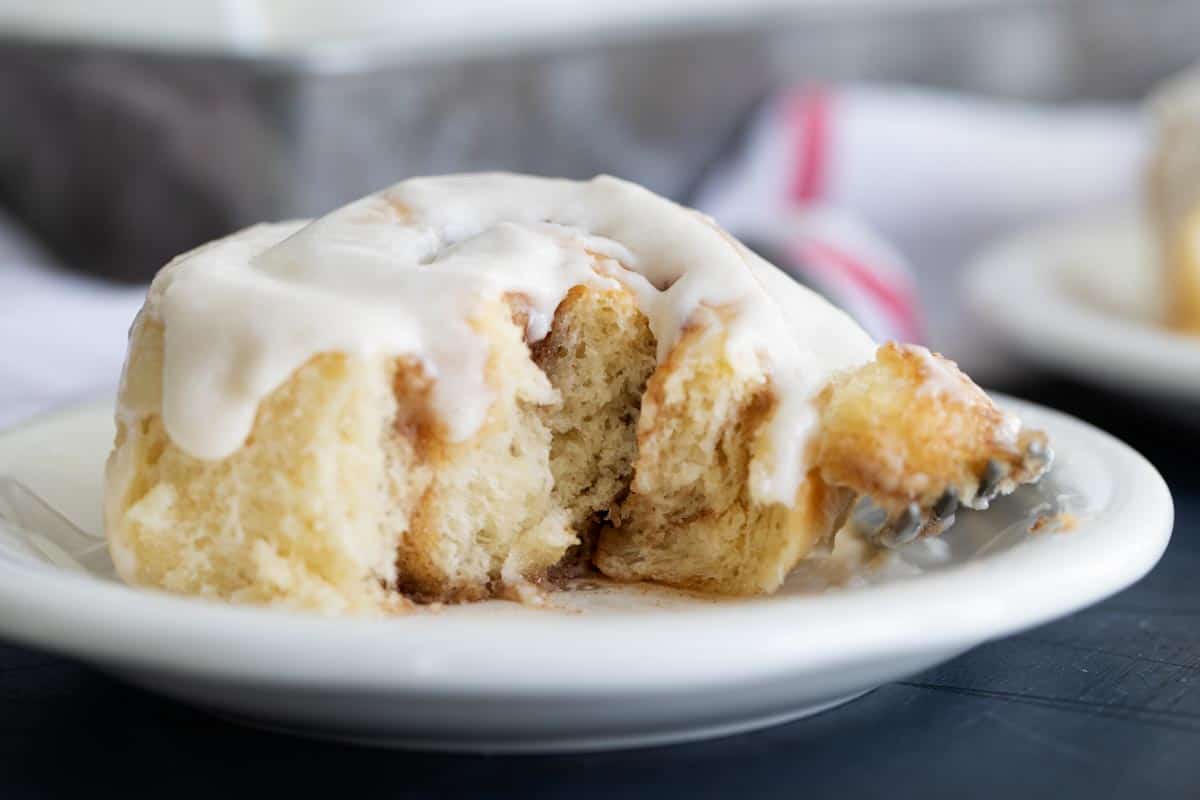
Soft and pillowy and filled with cinnamon sugar, these are the best homemade Cinnamon Rolls! Nothing fancy, these are sweet and gooey and the perfect breakfast treat.
There is nothing better than a good sweet roll for breakfast! Some other favorites are these Sticky Buns, these Sweet Potato Cinnamon Rolls, or for an easier recipe, try these Cinnamon Biscuits.
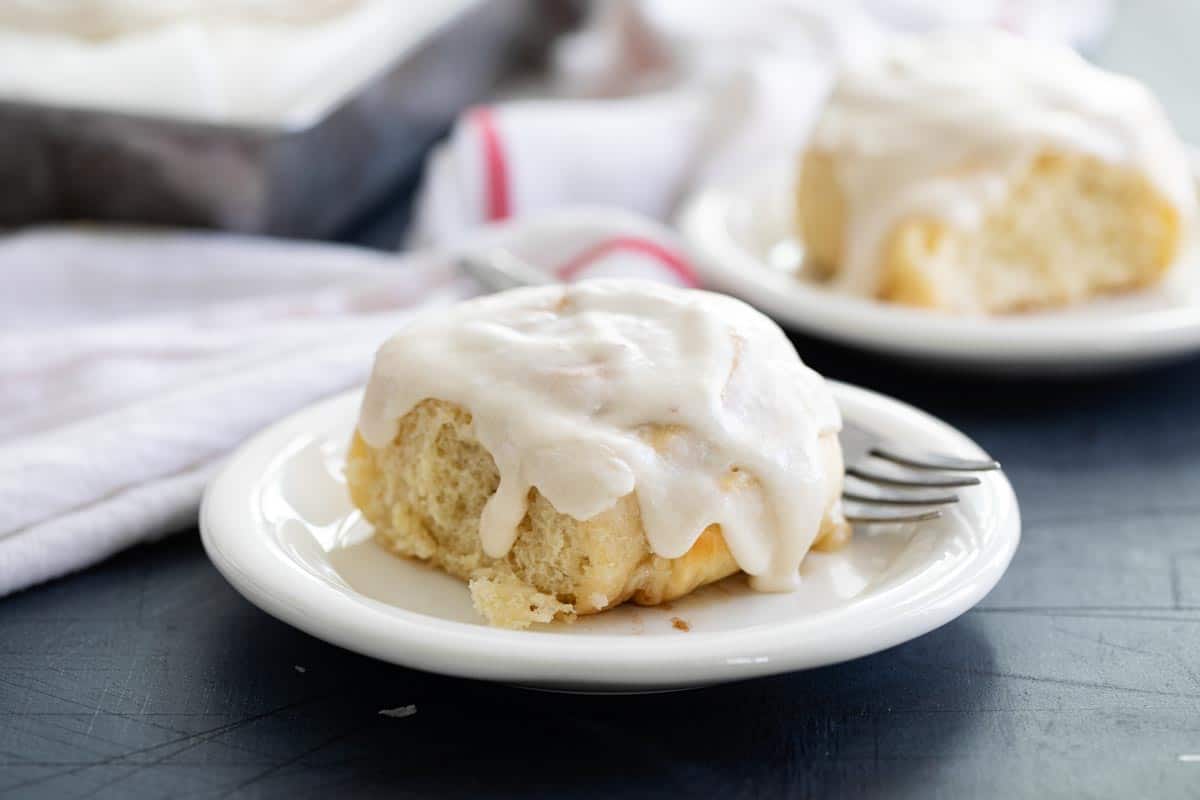
I have been making cinnamon rolls for years. Several times a year, for years. Yet I have never posted a regular, traditional cinnamon roll recipe.
And that is just a shame.
So I set out to bring you the best cinnamon roll recipe ever. I tested a few recipes. Not quite right. And then I remembered a recipe that I used to make regularly. And I knew that was the recipe I needed to share with all of you.
I got this recipe about 20 years ago from a friend, who I believe got it from someone at church. I’ve changed a few things from the original recipe, but really – these rolls are the ones. Nothing fancy, nothing crazy – just traditional, homemade cinnamon rolls done right.
I’ll walk you through the steps to make them below. There are lots of photos and lots of steps, but don’t be intimidated! And if you are a cinnamon roll pro, feel free to skip below to the recipe card!
How to Make Cinnamon Rolls From Scratch
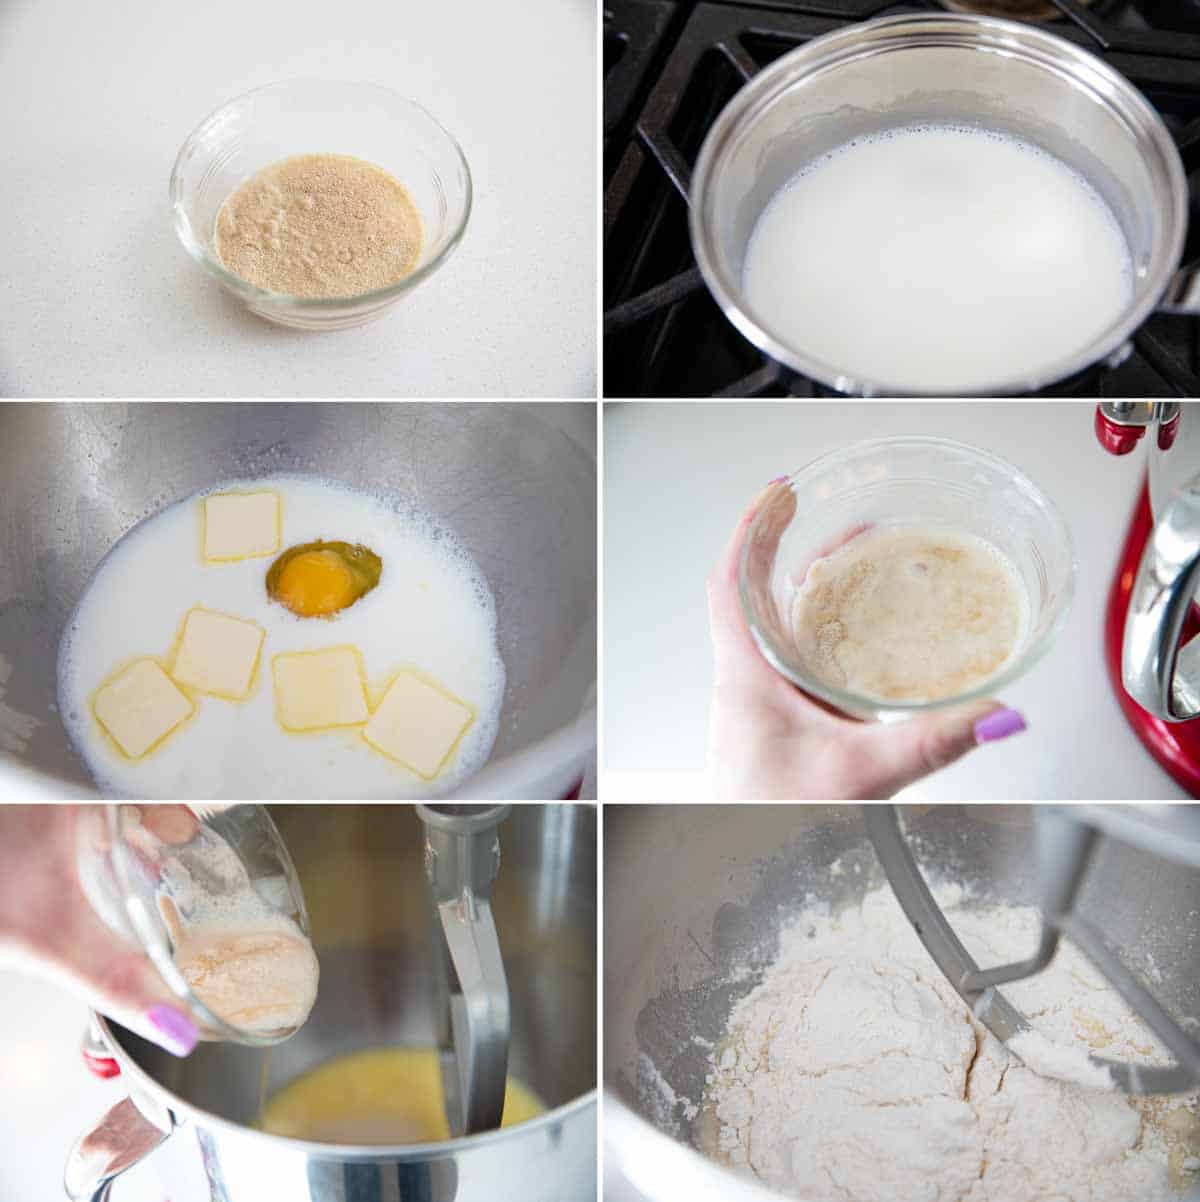
Soften your yeast in a small bowl. The yeast should start to foam. It’s ok if you have some dry patches of yeast in there, as long as the majority is getting a head start.
Scald your milk. If you’ve never done this before, there are some instructions and tips below.
Pour the milk into the bowl of your stand mixer. Add the sugar, butter, egg and salt. Start mixing on low – you want the butter to melt and for everything to mix together. Keep mixing until the mixture is lukewarm.
Add the yeast and water mixture, then add in 2 cups of the flour.
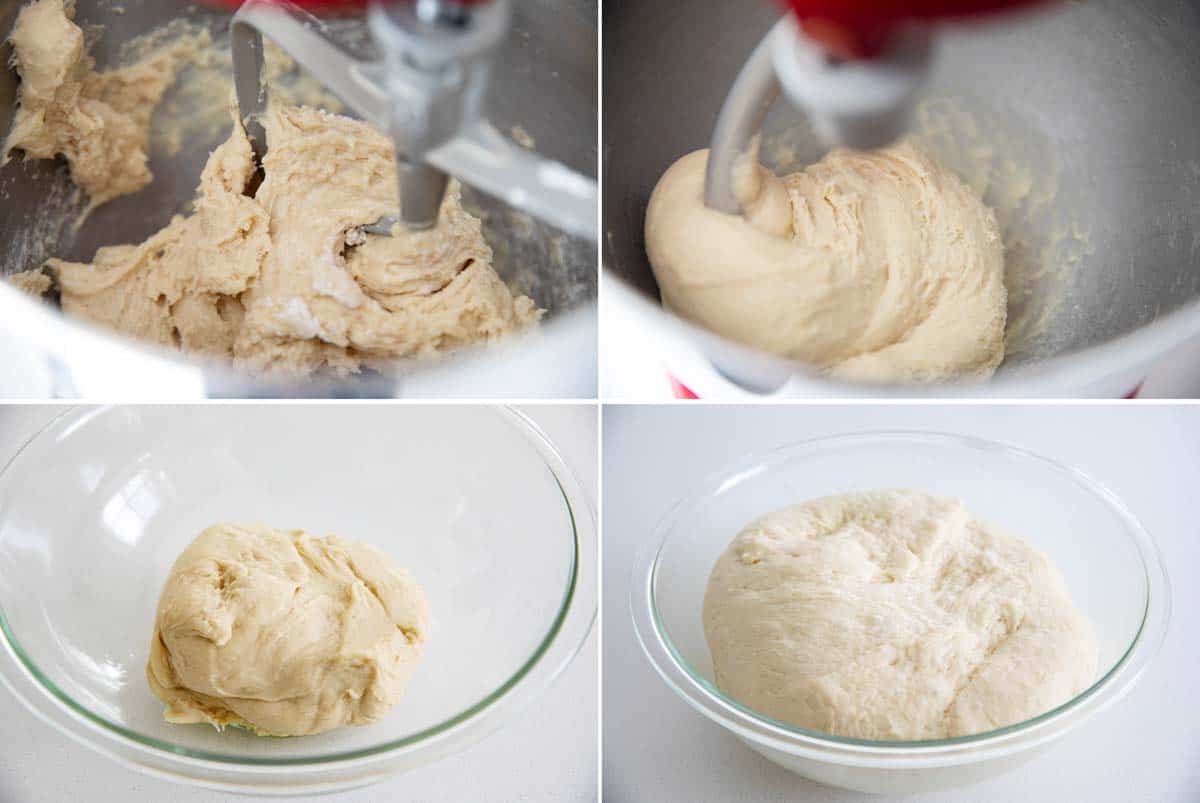
Continue to add the flour until the dough starts to come together. Then switch to the dough hook. Continue to knead the dough, adding more flour if needed.
My biggest hint is to not go too heavy on the flour. The dough should still be slightly sticky – you can see that mine is still slightly sticking to the bottom of the bowl. You can always add more flour as you are rolling the dough, but you can’t take any of the flour away.
Once the dough is kneaded, transfer it to a greased bowl. Cover and let it rise until it has about doubled in size.
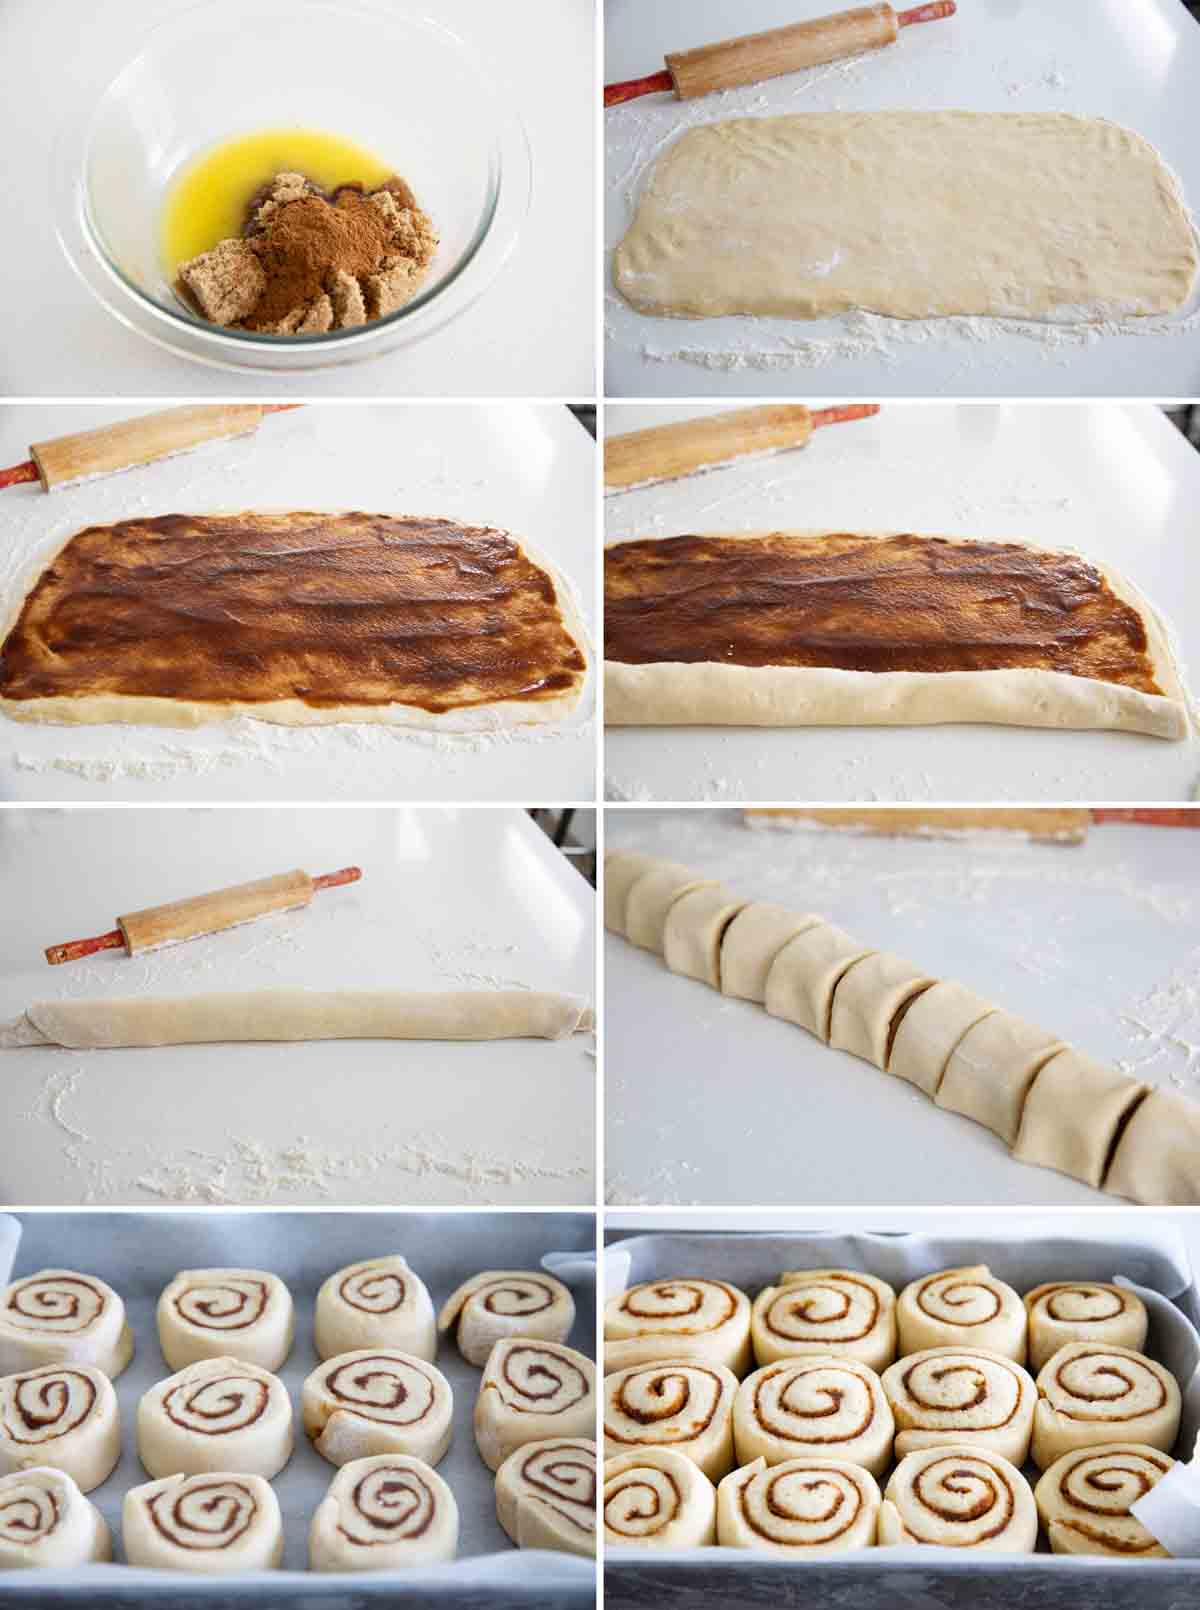
Make the filling by combining melted butter, brown sugar and cinnamon.
Roll the dough on a floured surface into a rectangle about 18 inches by 10 inches. It doesn’t have to be exact, but something close.
Spread your filling over the dough, up to about 1/2-inch of the edges.
Roll the dough into a long log.
Cut the dough into 12 equal pieces. I like to cut off the ends, first, so that you don’t have a couple rolls that are ragged or that don’t have enough filling.
Place the rolls in a prepared baking dish.
Cover again, and let them rise until doubled again. They should be touching at this point. Then transfer to the oven to bake until golden brown.
The Best Way to Frost Cinnamon Rolls
This is the one special “trick” I have to make your rolls a little extra gooey. Feel free to frost the rolls as you normally would, or follow my steps below.
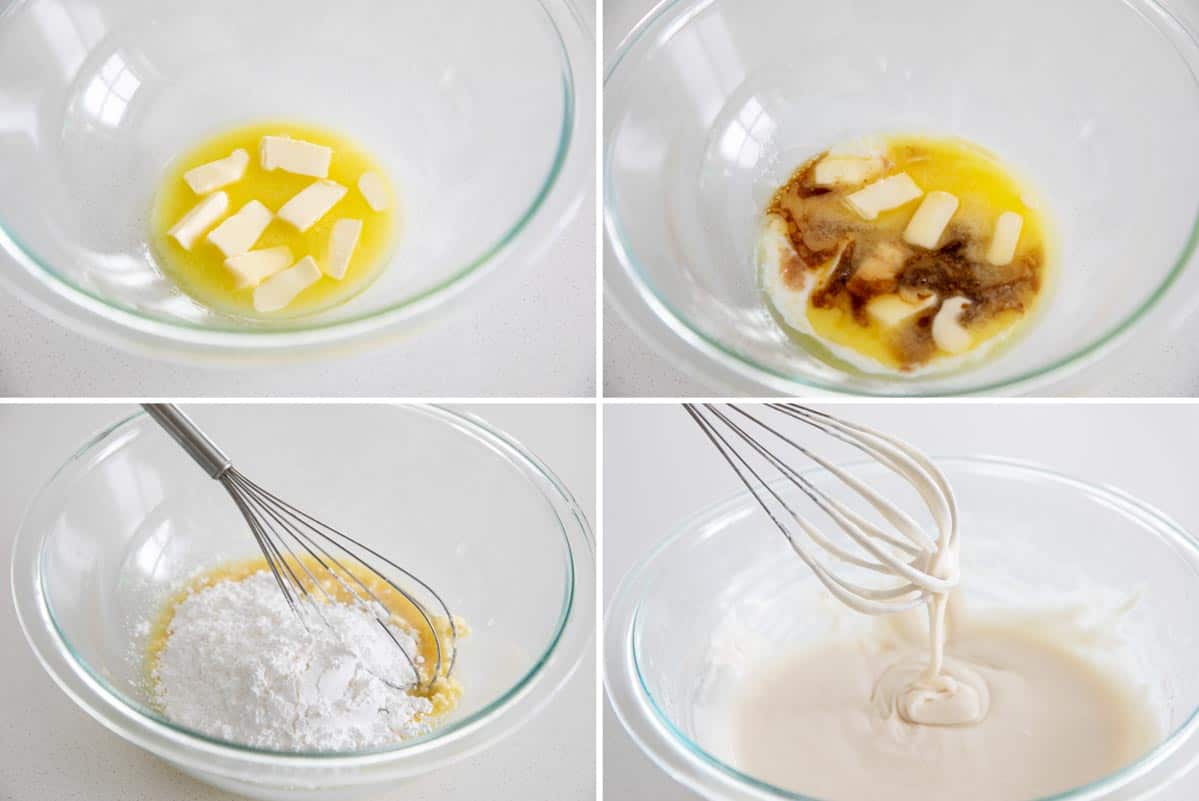
Make your icing – slightly melt the butter. You don’t want it just soft, but you don’t want it all the way melted. Somewhere in between. I find that about 45 seconds in the microwave gets it there.
Add in the milk and vanilla.
Start adding in powdered sugar until the icing is thick, yet pourable. It should look the same as the photo above.
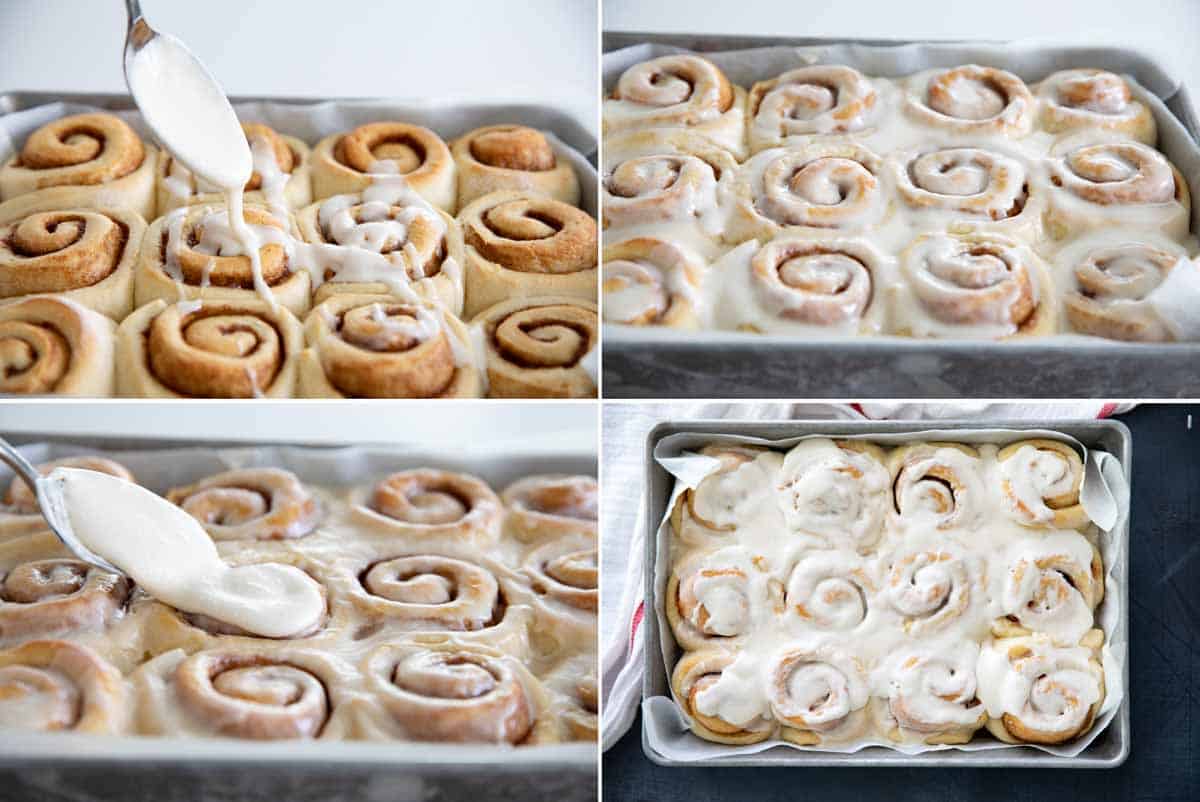
Now here is my gooey trick:
When the rolls are done, right after they come out of the oven, take about 1/3 of the icing and spread it on top of the rolls. You want this to soak into the hot rolls, so it needs to be added right when the rolls come out of the oven.
Let the rolls cool for about 20 minutes, then spread the remaining icing on top.
How to Scald Milk
I feel like scalding milk is a recipe trick that shows up in a lot of older recipes (like the ones passed down from grandma), but you don’t see it as often these days.
What is scalding, and why do you do it? And how do you do it?
Back in the day (like for grandma’s recipes) they may have scalded the milk to kill germs, back before milk was pasteurized. That is not why we are doing it for these cinnamon rolls.
By scalding the milk, you are killing the enzymes that can hinder your dough from rising properly.
Technically, you can make this recipe by not scalding the milk. But this small, easy step will help you to have fluffy, perfect cinnamon rolls.
To scald the milk, you want to heat it to just before it starts to boil. Do not boil it – that is taking it too far. If you want to use an instant read thermometer, you’ll want it to be 170ºF. I don’t usually use a thermometer – I just watch it until it starts to get bubbles around the outside of the pan. A thin skin may form on top, and that’s ok – it will all mix in when you go to make the rolls.
Just be sure to cool the milk mixture to lukewarm before adding the yeast mixture. Otherwise, you will kill the yeast.
Tips and Tricks
- If you want to make these ahead of time and bake them in the morning, you can! Just follow the instruction card through step 11. Cover the pan and refrigerate overnight. In the morning, remove the pan from the refrigerator and let the rolls rise for the second rise. This will probably take longer than the 40 minutes because the rolls are starting out cold. Then continue the recipe as written.
- This makes a generous amount of icing. I like to save some of the icing to serve on the side, so people who want more can add more, and those who don’t want as much can have the rolls as is.
- This is a basic powdered sugar icing. If you want a cream cheese icing, the icing on these Pumpkin Cinnamon Rolls is my favorite! You can leave out the maple extract, if desired.
- The cinnamon rolls are best served the day they are baked, but the leftovers aren’t too shabby! Make sure they are covered (otherwise they will dry out). A few seconds in the microwave will really bring them back to life, as well.
- If you don’t have a stand mixer, you can make the dough by hand. I like to use my stand mixer because I feel like I can get away with using less flour because I don’t have dough stuck to my hands, but just make sure you don’t go overboard on the flour if you are kneading the dough by hand. I suggest a big bowl and a wooden spoon for mixing everything together.
- You can use bread flour in place of the all-purpose flour. I actually think it makes a better cinnamon roll, but I know that not everyone keeps bread flour on hand.
- You can also freeze these rolls – I like to freeze them after they are baked, but before they are iced. You can’t do my melting icing trick that way, but I do think they taste the best if the icing is fresh.
More Sweet Breakfast Recipes
- This waffle recipe really is The Best Waffle Recipe. My family asks for them all the time!
- If you’re looking for a good overnight breakfast casserole, this Overnight French Toast Casserole is my favorite.
- Another great from scratch recipe is this Monkey Bread recipe.
- We make muffins regularly at our house and these Cinnamon Muffins are always in the rotation.
- Is it cake or is it breakfast? Who knows, and who cares, because this Sour Cream Coffee Cake is delicious!
LOOKING FOR MORE FREE RECIPES?
Subscribe to my free recipe newsletter to get new family friendly recipes in your inbox each week! Find me sharing more family-friendly inspiration on Pinterest, Facebook, and Instagram.
Cinnamon Rolls
Ingredients
Rolls:
- 2 1/4 teaspoons active dry yeast
- 1/4 cup warm water
- 1 cup milk
- 1/4 cup sugar
- 1/4 cup butter cut into pieces
- 1 egg
- 1 teaspoon salt
- 3 1/2 cups all-purpose flour
Filling:
- 1/2 cup brown sugar
- 4 tablespoons melted butter
- 2 teaspoons ground cinnamon
- 1/2 cup raisins optional
Frosting:
- 4 tablespoons butter slightly melted
- 1/4 cup milk
- 2 teaspoons vanilla
- 2 1/2 cups powdered sugar
Instructions
- In a small bowl, combine the yeast and the warm water. Set aside until the yeast is bubbling.2 1/4 teaspoons active dry yeast, 1/4 cup warm water
- Place the milk in a small saucepan and set over medium heat. Heat until scalded – it should bubble around the edges, and a skin may form on top, but do not let it boil. It should be just before the point of boiling.1 cup milk
- Pour the scalded milk into the bowl of a stand mixer (or into a large bowl if making by hand). Add the sugar, butter, egg and salt. Mix on low until the butter is melted and the mixture is lukewarm.1/4 cup sugar, 1/4 cup butter, 1 egg, 1 teaspoon salt
- Add the yeast mixture and mix to combine.
- Add 2 cups of the flour and mix. Continue to add flour until the dough comes together. It may still be a little sticky – it will mostly pull from the sides of the bowl, but will still stick to the bottom. Switch to the dough hook and mix on medium low for about 3-4 minutes, adding more flour if needed.3 1/2 cups all-purpose flour
- Coat a large bowl with oil and add the dough. Cover with a towel or with greased plastic wrap and let rise until doubled, about 1 1/2 hours.
- Line a 13×9-inch baking pan with parchment or spray with nonstick cooking spray.
- Once the dough is risen, punch it down and pour out onto a surface that has been dusted with flour. Roll the dough into a rectangle about 18 inches by 10 inches.
- In a small bowl, combine the brown sugar, melted butter and cinnamon. Spread the mixture evenly over the dough, leaving a 1/2-inch border around the outside. Sprinkle on the raisins, if using.1/2 cup brown sugar, 4 tablespoons melted butter, 2 teaspoons ground cinnamon, 1/2 cup raisins
- Roll the dough up on the long side.
- Cut the uneven edges on each side of the log of dough with a serrated knife. Cut the remaining dough into 12 equal sized pieces. Place the dough in 3 rows of 4 in the prepared baking dish. Press them down slightly to make them all even.
- Cover the dish and let rise until the doubled, about 40 minutes.
- Preheat the oven to 350ºF. Once the rolls have risen, bake until they are golden brown and cooked through, about 15 minutes.
- While the rolls are baking, make the icing.
- Place the butter in a microwave-safe bowl and melt until mostly melted, but not melted all the way. You will still have chunks of butter, but some will be liquified. Add the milk and the vanilla. Start adding in powdered sugar, 1/2 cup at a time, until you reach a consistency that is thin enough to drizzle but thick enough that it drips from the whisk. Whisk until smooth.4 tablespoons butter, 1/4 cup milk, 2 teaspoons vanilla, 2 1/2 cups powdered sugar
- When the rolls are done baking, remove from the oven. Take about 1/3 of the icing and drizzle or spread over the top of the hot rolls. This will melt into the rolls.
- Once the rolls have cooled for about 20 minutes, spread the remaining icing over the top of the rolls.*

Debra says
Just made these this morning (actually made them last night and let them slow rise in the refrigerator overnight before baking this morning.) They are amazing! So soft and rich and full of flavor.
Deborah says
Thanks, Debra – I’m glad they were a hit!
David Barnes says
I love the recipe but on your instructions for the filling it say mix the combine the brown sugar and melted sugar instead of melted butter. Just a typing error.
Wendy says
I’ve been looking for a recipe that gives step by step photos coz I’m this person who fails at cinnamon rolls miserably. I find it hard to get fresh yeast where I live though, will the recipe still work using dried yeast, instant or active, I have both?
Deborah says
Either instant or active will work! I usually use active, but instant is just fine.
Ken longo says
No raisins! It’s not a true cinnamon roll without raisins!
Deborah says
I love raisins, too, but my family does not. I do have them added as an option in the recipe card, though!!