My all-time favorite homemade pizza dough recipe, this recipe has been tried and tested week after week, making the best homemade pizza. My family now likes homemade pizza better than take-out!
We are definitely pizza obsessed at our house!! Once you’ve perfected this dough, use it to make my White Pizza or BBQ Chicken Pizza.
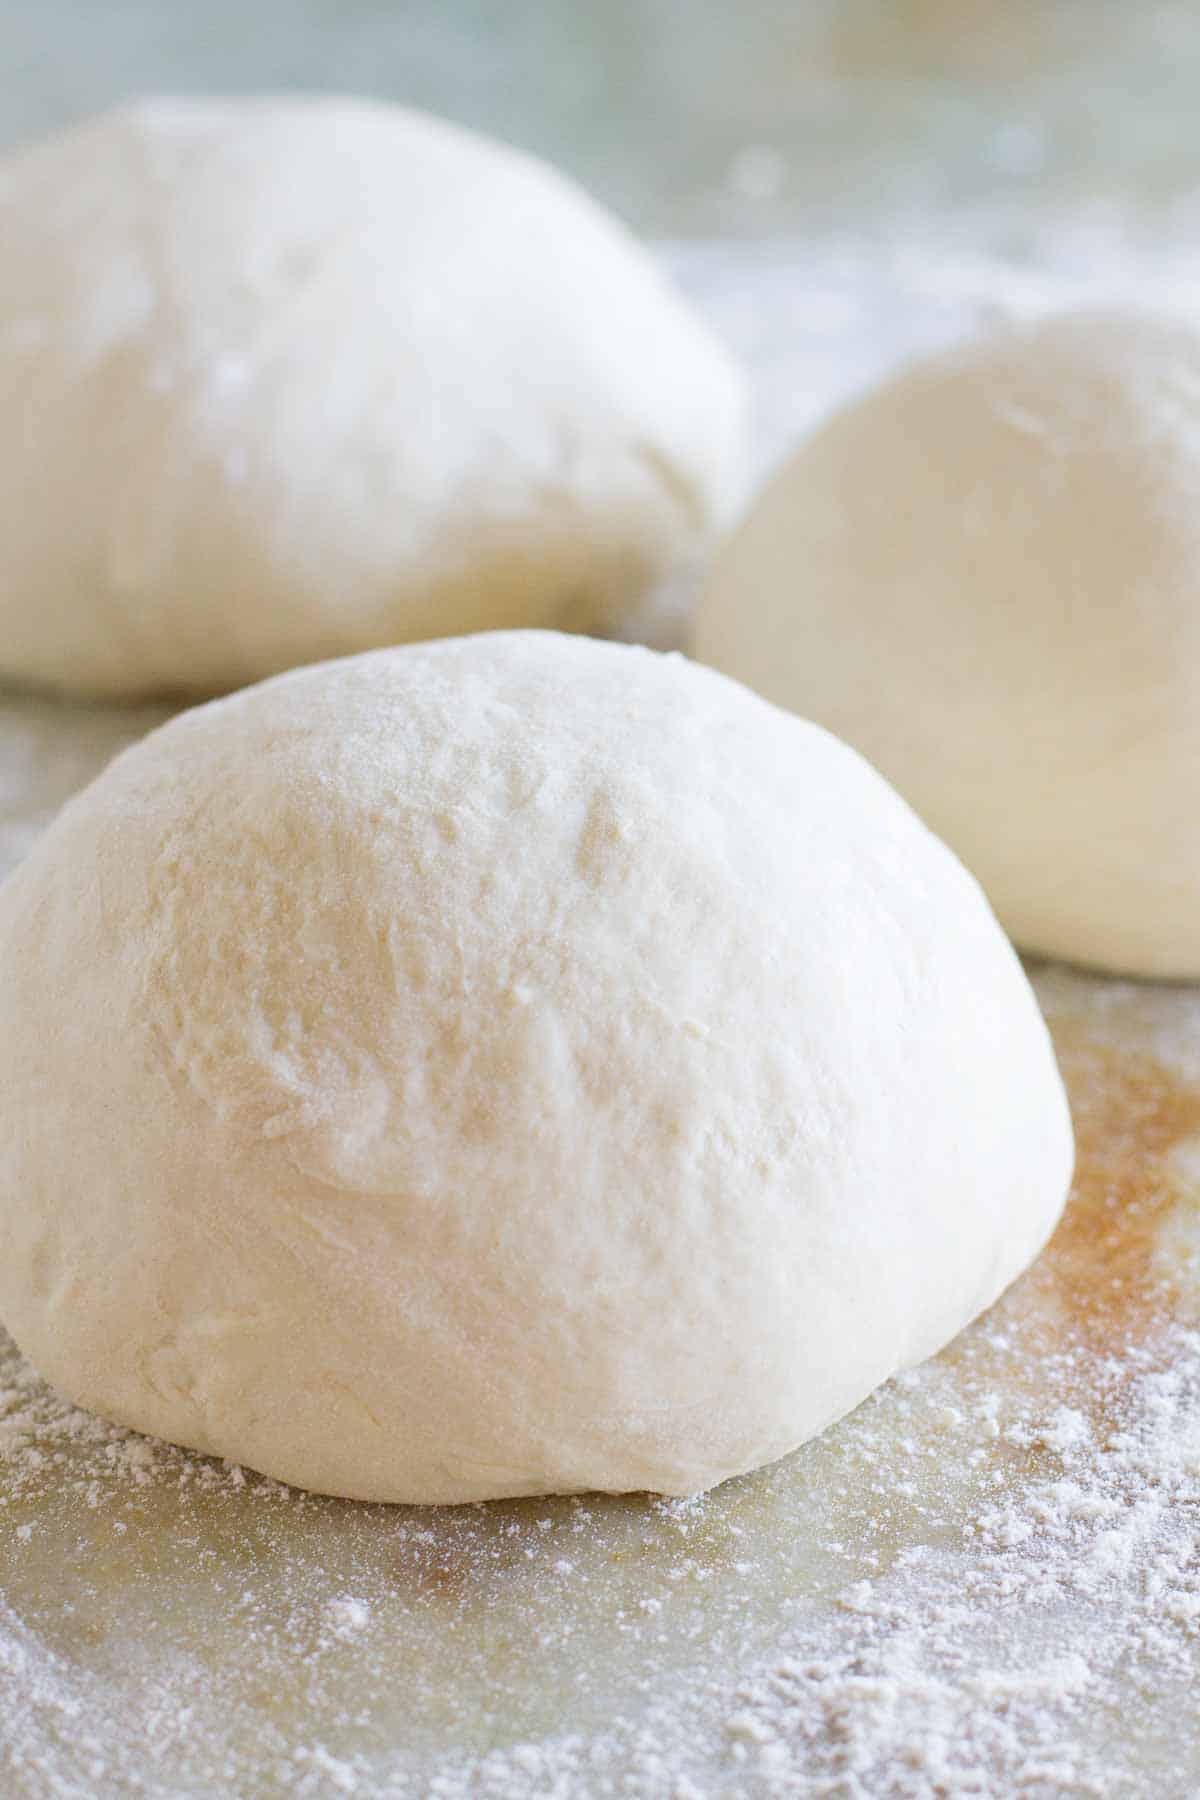
We are a pizza loving family. And for years, I searched and searched and searched for the perfect pizza dough recipe. I tried dozens, or more. And while some were good, none of them were *that* recipe that would make me stop trying all of the others.
And then, back in 2011, I tried the pizza dough recipe from Artisan Pizza and Flatbread in Five Minutes a Day. And I was pretty sure I had finally stumbled onto *that* recipe. If you haven’t tried that recipe, you really should, because it really does rank up there with the best of the best.
The problem with that dough, though, is that it is best when it has had some time to “age” in the refrigerator. And, well, while I am a stickler for a menu plan, I rarely stick to the order on my menu plan, often making what sounds the best on any given day instead of the actual meal planned for that day. And if I had endless refrigerator space, I’d keep some of that dough on hand always, but that’s not the case either.
So even though I adored that recipe, I knew I needed a recipe that could be made the same day. It would just work better for my family.
That’s when I tried a recipe from Budget Gourmet Mom (unfortunately, her blog is no longer online). It was the best pizza dough that I had come across. I made it many times, and claimed that it was my new favorite. But over the past couple of years, I have, at least in my opinion, perfected the method of making the best pizza you will have at home.
I don’t say this lightly. I’m not kidding you when I say I’ve made this recipe dozens and dozens of times.
The Secret to the Best Homemade Pizza Dough
The secret is in how much flour you add to the dough. This is where I get a little unconventional, because the ingredients are all pretty normal. But my #1 thing that I have said for years with bread making is that I think many times people fail and end up with dry, dense bread because they are adding too much flour. And when I thought about the pizza dough recipe from Artisan Bread in Five Minutes a Day, I thought about how wet that dough was, and how I never questioned it because I always did the ingredients by weight and just trusted.
So where this recipe differs from most is the amount of flour and the consistency of the dough.
My #1 rule – less is more.
I have included step by step photos below to walk you through it, but the most important step is to not keep adding flour until the dough is not sticky anymore. Sticky means you are doing it right in this recipe. (See – told you this was different. This goes against pretty much every other pizza dough recipe out there.) Don’t be afraid about the dough sticking everywhere when you roll it out. It’s not quite as sticky after it rises, and you’ll use some additional flour to shape it and roll it.
This recipe might not come easy the first or second time you try it. It’s one of those recipes that might take a little bit of practice. But believe me – for the perfect homemade pizza, it’s totally worth it.
Ingredients
Water: You want your water just warmer than room temperature. I don’t get too particular on this, but it does need to be warm. But not hot, because that can kill your yeast.
Sugar: No, the dough is not sweet with the sugar. I have not tested this recipe using less sugar, but feel free to do some testing of your own if you want to cut back on the sugar.
Yeast: I usually use active dry yeast, but have used instant yeast with success, too.
Oil: A lot of people over on YouTube have strong opinions about my use of vegetable oil, but I like that it has a neutral flavor. By all means, you can substitute for another oil. Olive oil will give it great flavor if you want that.
Flour: I only use all-purpose flour. Mostly because I always have it on hand. Many people have used 00 flour with great success, but I don’t keep it on hand.
Salt: My favorite salt to use is a coarse kosher salt, but sea salt is great, too.
Tips for Making Homemade Pizza Dough
I know I’m already totally long winded here, but here are a few additional tips:
- This makes 3 1-lb balls of dough. It’s a lot, but I usually make 3 pizzas (we’ll eat 2, and save the third for leftovers). Most recipes call for a 1 lb ball of dough, but in all honesty, we usually like our pizza a little more on the thin side. So I have halved this recipe and made 3 pizzas, or I will make 4 pizzas from this recipe. It is easy to cut in half, so feel free to do so. Also, not everyone’s mixer has the capacity to make this much dough. Use common sense.
- I usually make my dough a couple of hours before I need it and just refrigerate the dough until needed. It’s a little easier to roll out when it’s not super cold, but straight from the fridge still works. I recommend making it within 24 hours, though, as the dough will continue to rise, even in the refrigerator.
- When it comes to baking your pizza, I always recommend using a pizza stone. They are pretty inexpensive and make a huge difference. I bought mine at Bed Bath and Beyond for $20 years ago and have probably used it over 100 times and it is still going strong. I always preheat the oven for at least 30 minutes. I also use parchment paper when baking my pizza because 1) my husband doesn’t care for the cornmeal on the bottom of the pizza, 2) I’m terrible at transferring the pizza from the pizza peel to the stone. Parchment paper works well for me.
- To bake the pizza, if you aren’t following a specific recipe, I’ll crank my oven up as high as it goes and bake each pizza for about 10 minutes.
How to make Homemade Pizza Dough
Whew!! That was a lot. 🙂 Here is the step by step – I hope you love this recipe as much as we do!
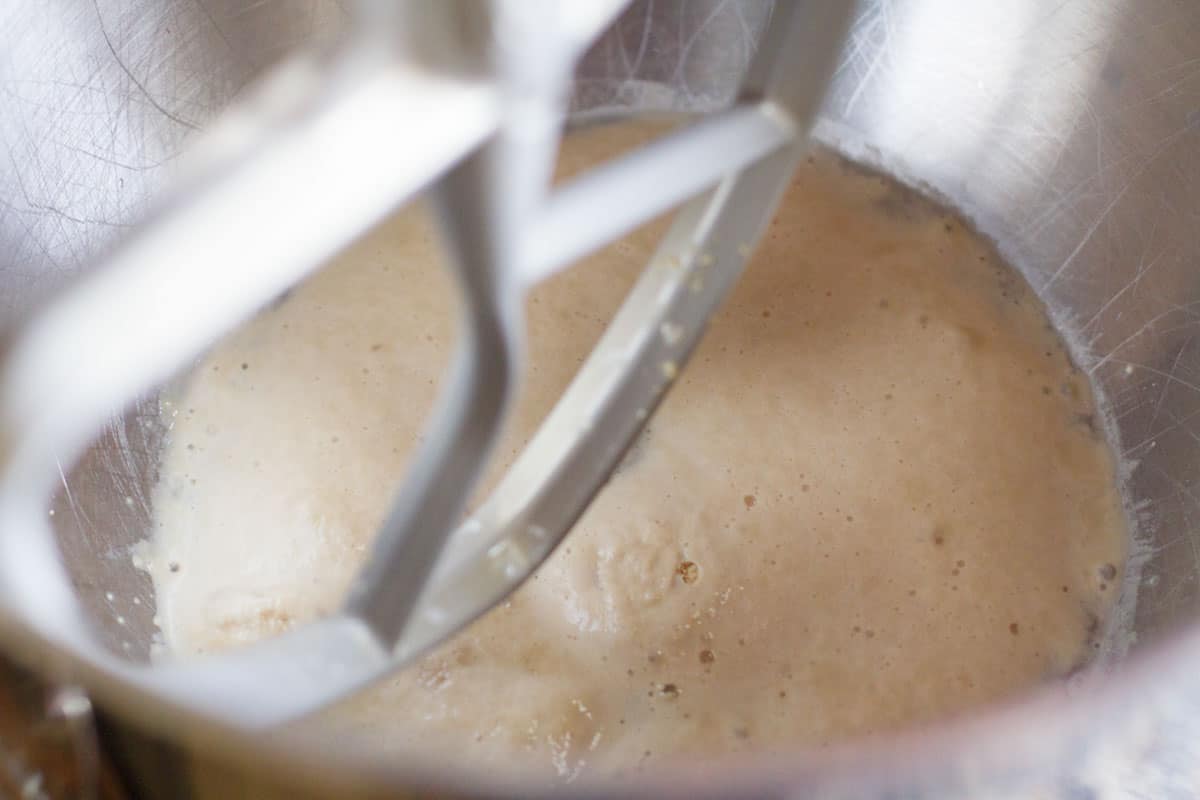
1: Start by combining warm water with your yeast and some sugar. It should start to froth up after a few minutes. If it doesn’t, toss it and start again. You water may be too warm or your yeast may be bad. Once it’s frothy, add in the vegetable oil.
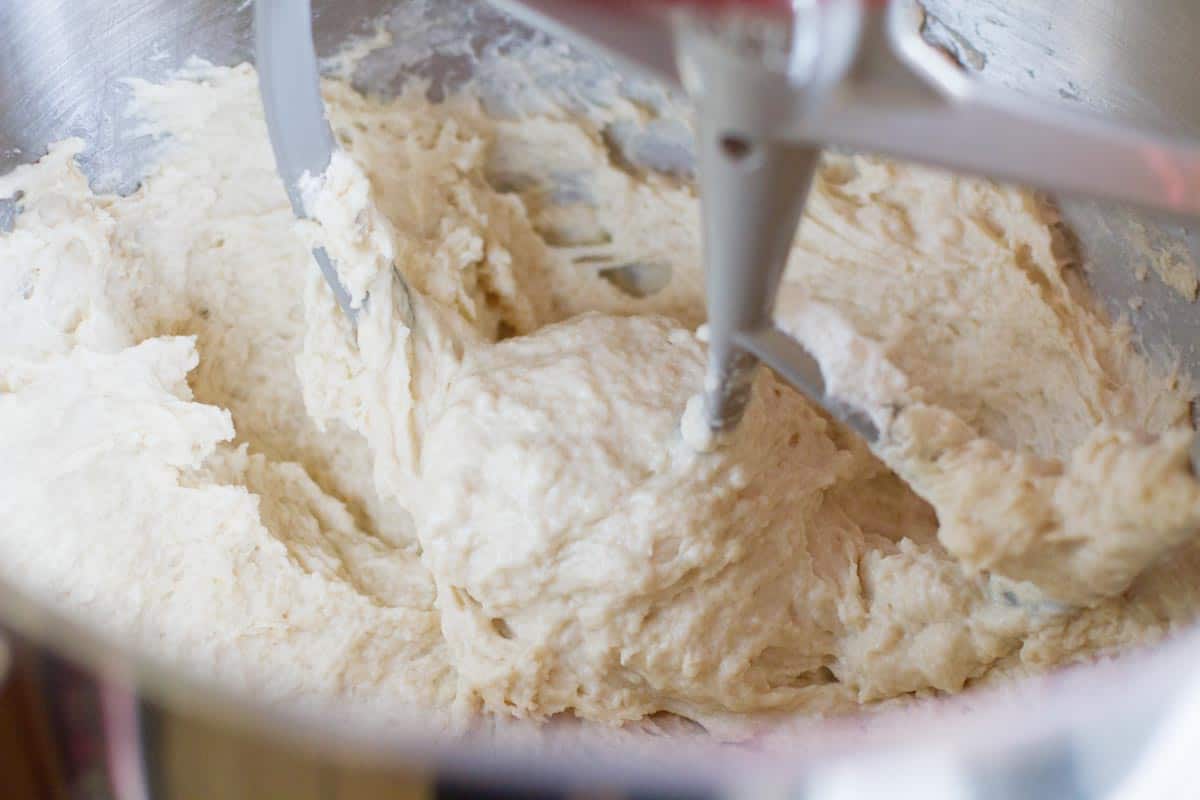
2: Combine the salt and the flour, and start adding the flour to the mixer, 1/2 cup at a time.
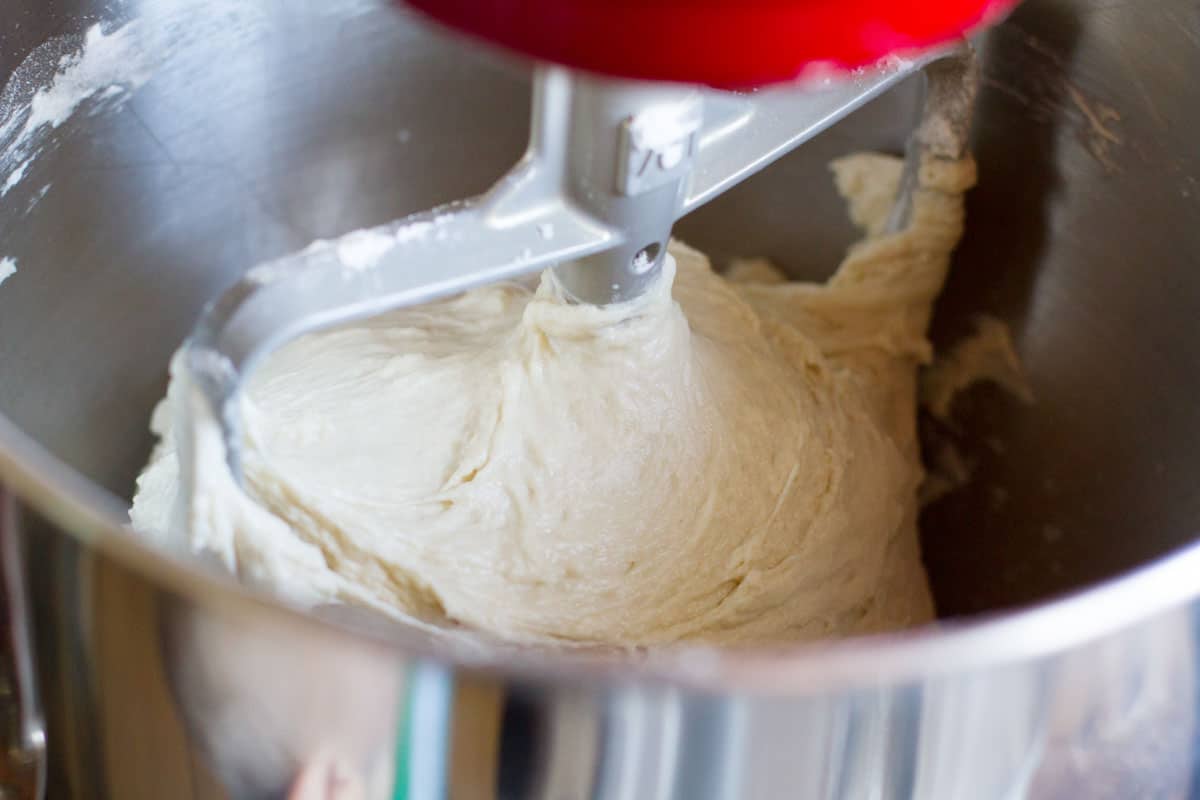
3: Once you have added the flour, the dough will still look pretty wet and sticky. It will not pull away from the sides of the mixer by itself, but you should be able to scrape it down with a spatula. You may need to add a little bit more flour, depending on your environment, but don’t go crazy.
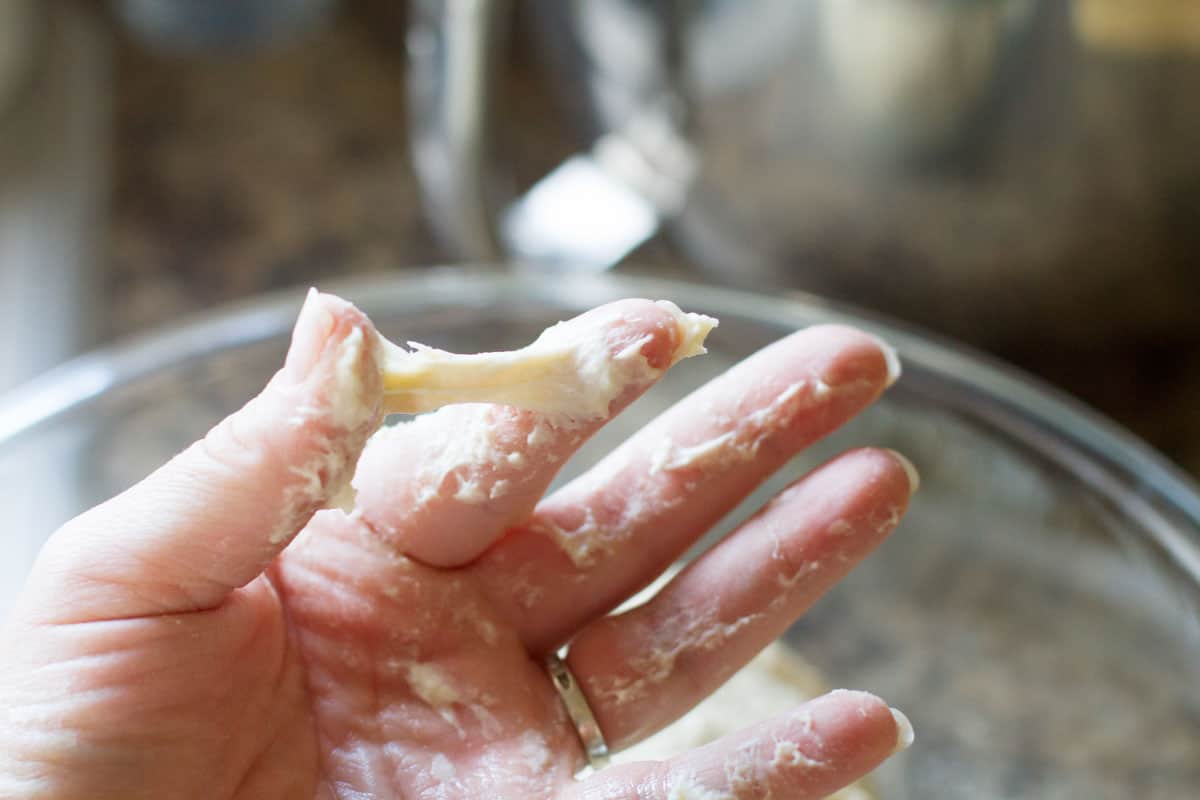
4: Most pizza dough recipes will say it should be tacky but not sticky – not this one. It should stick to your fingers still.
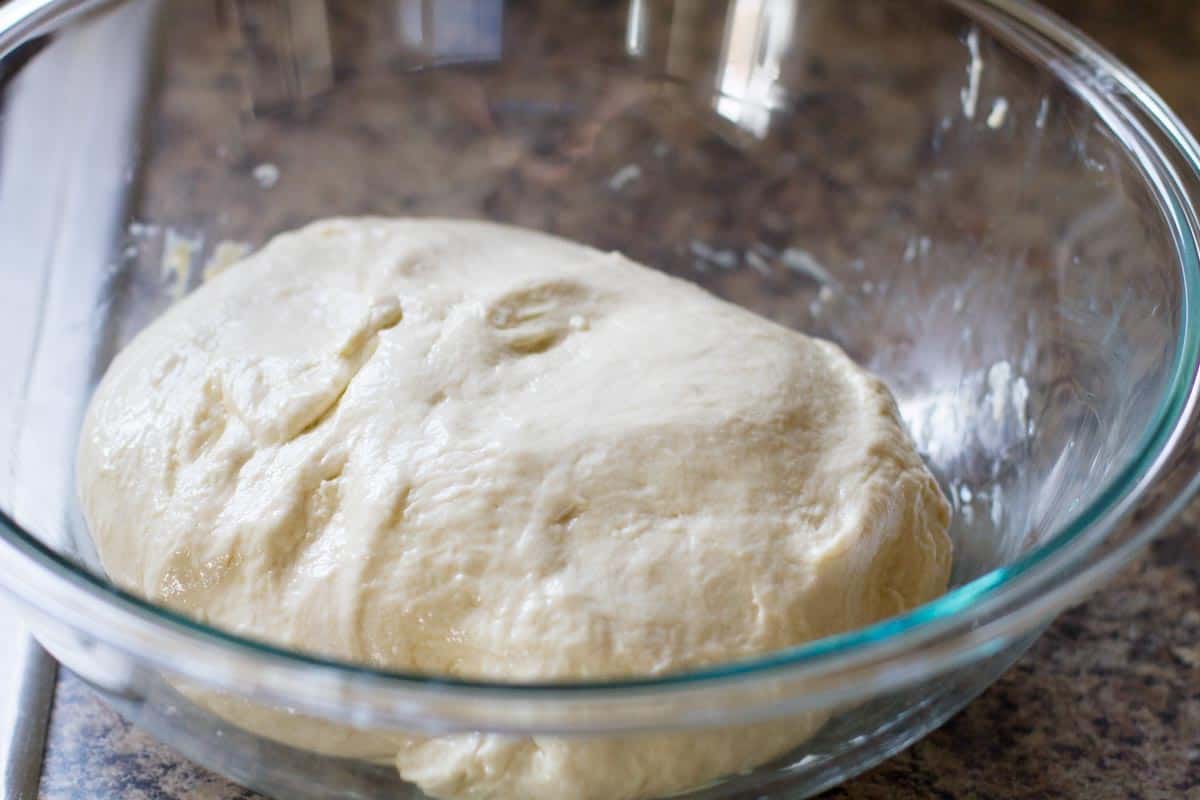
5: Grease a large bowl. I usually just pour some vegetable oil or olive oil in the bottom of the bowl, then scrape the dough out into the bowl. You will need a spatula to scrape the dough from the mixer bowl. Then using greased hands, turn the dough over to coat the outside of the dough in the oil.
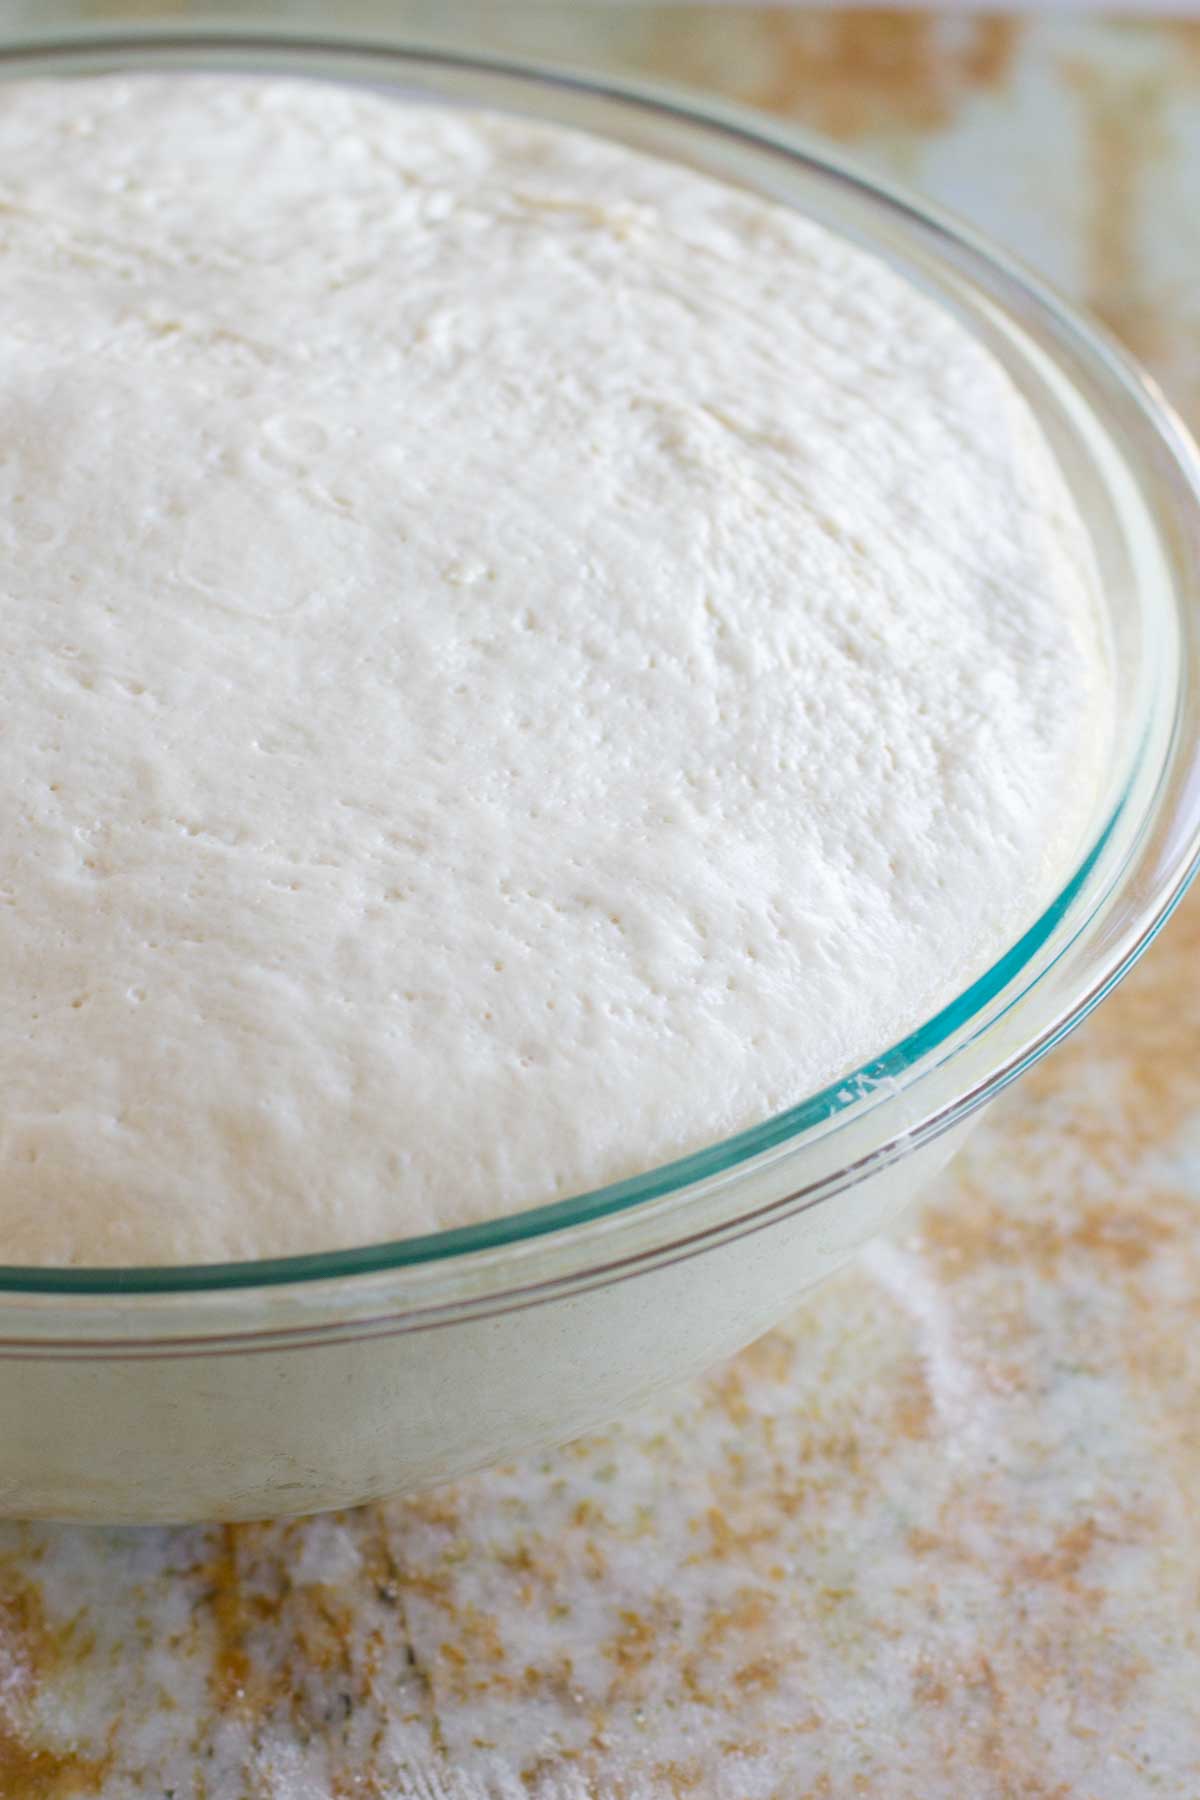
6: Cover the dough with a towel or greased plastic wrap and allow it to rise until it is double in size. This usually takes about an hour, depending on how warm the house is. I will often put the bowl in the oven with just the oven light on, which tends to give it a good temperature for rising.
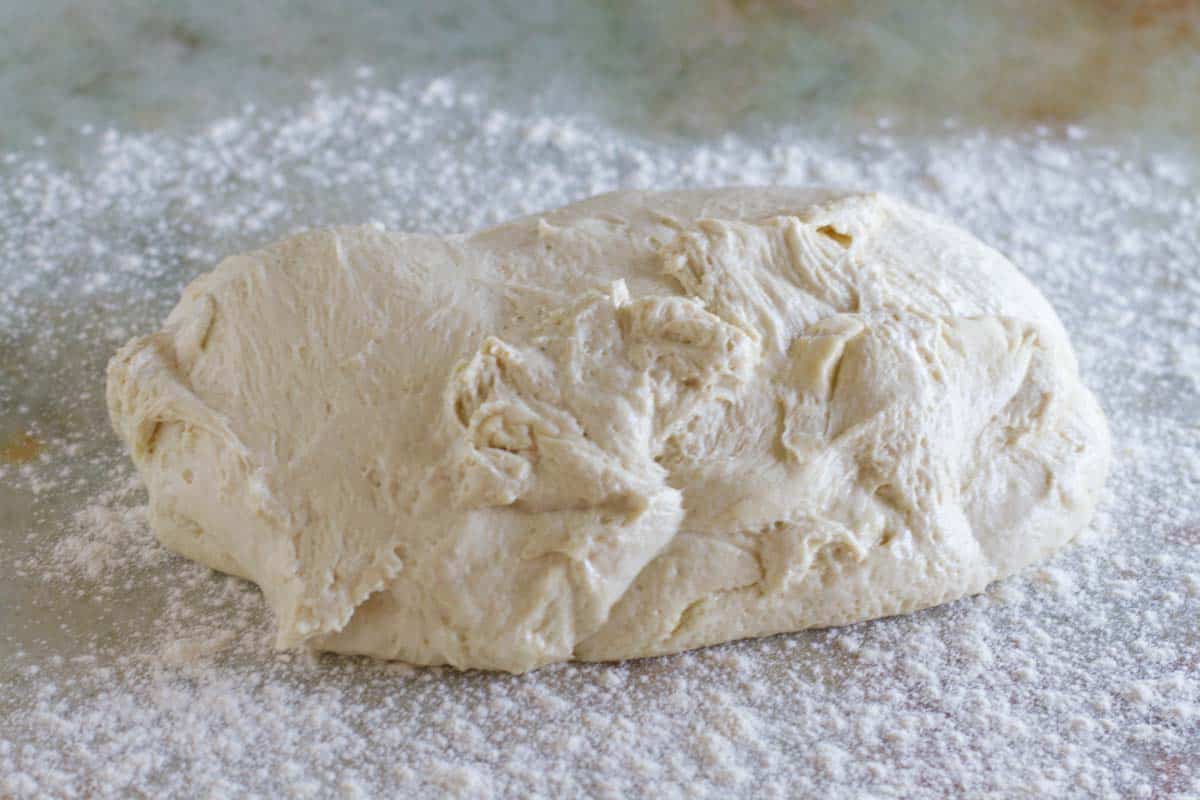
7: Sprinkle some flour on a work surface. Lightly punch the dough down, then turn it out onto the floured surface.
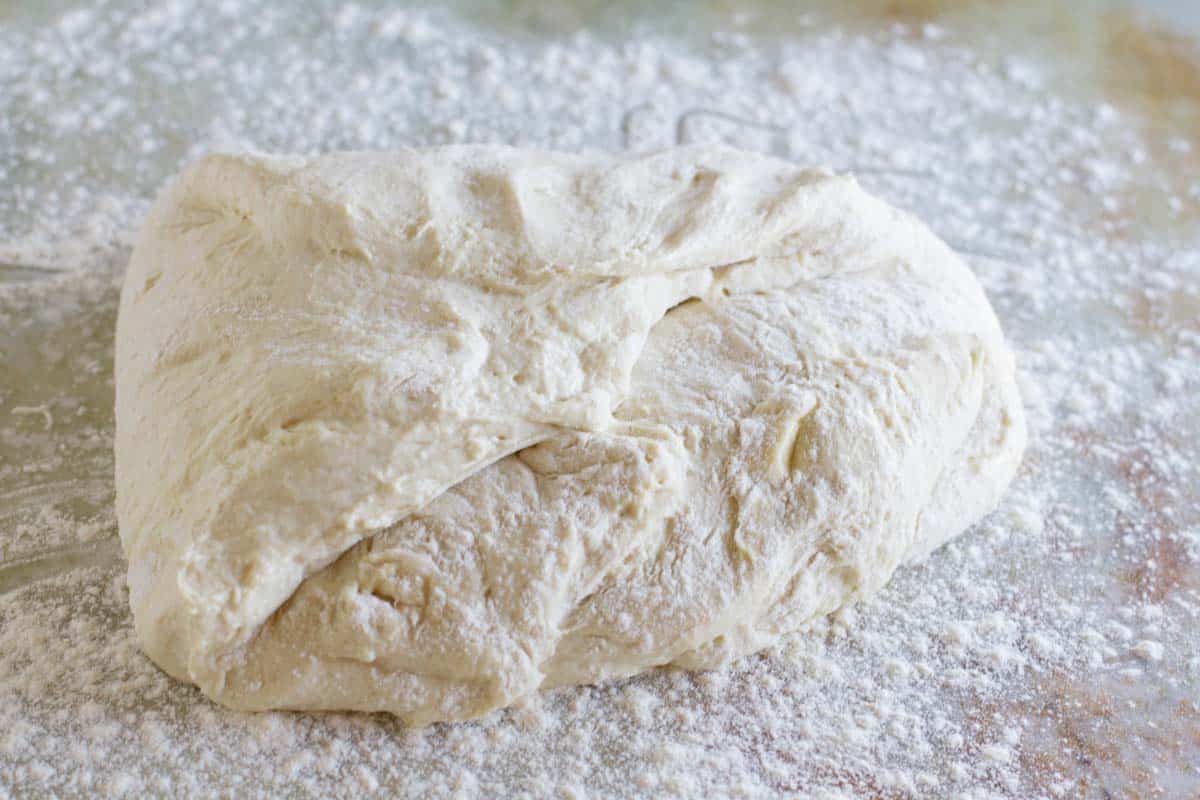
8: Use floured hands to start pulling the dough up and around, gathering the ends together and forming a smooth ball on one side.
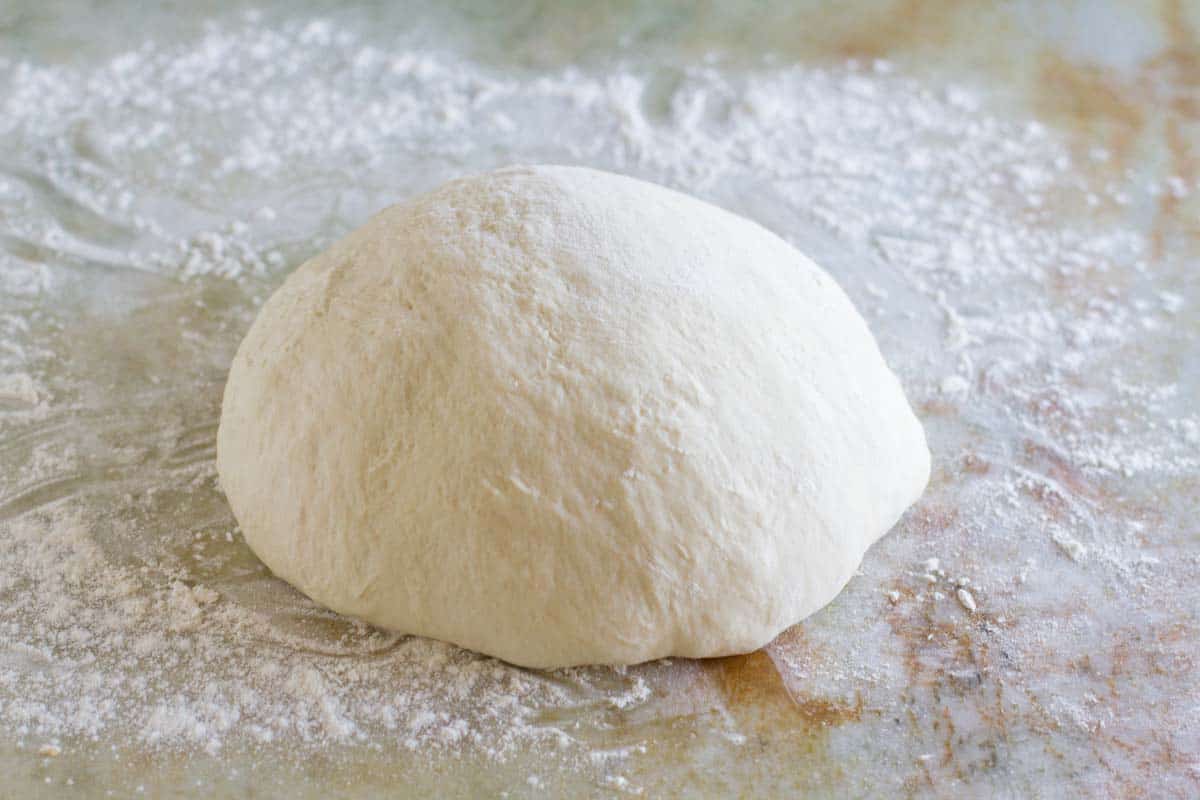
9: Turn the ball over, so the top now is smooth.
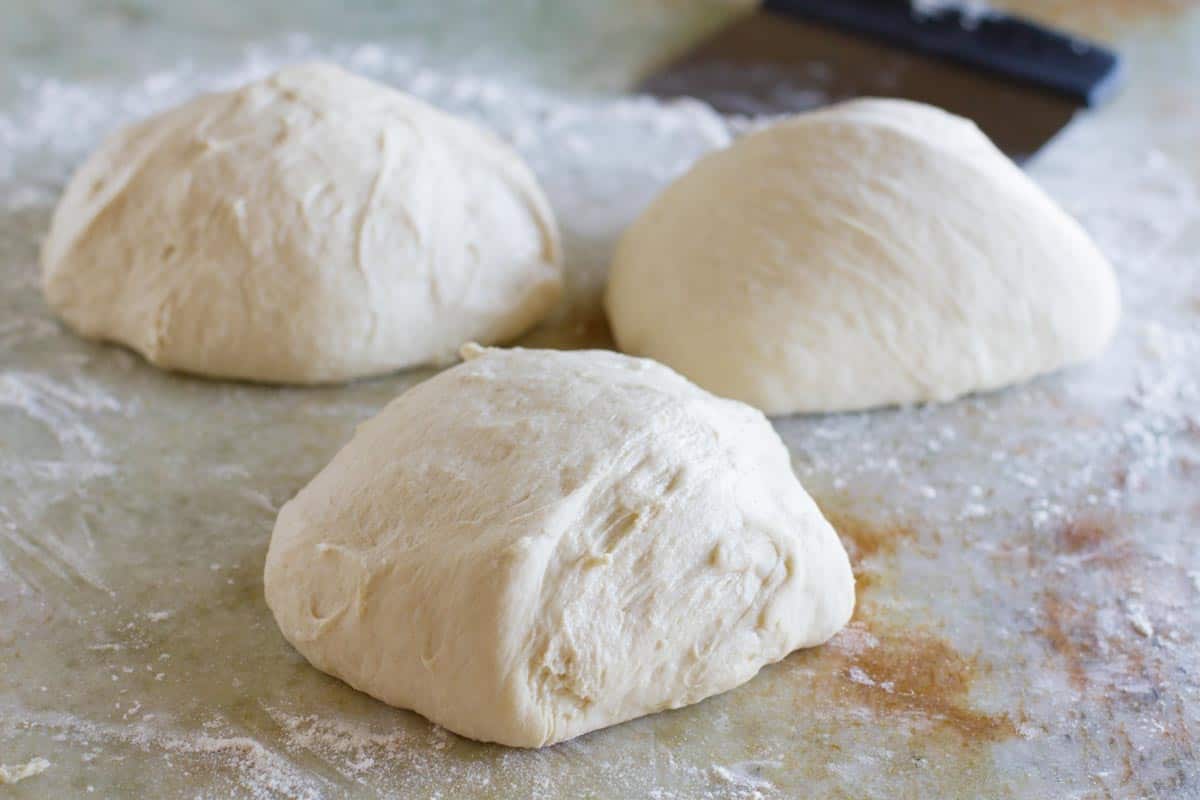
10: Divide the ball into 3 equal portions. You can weigh them to keep them even, or I almost always just eyeball it.
Voila! Your pizza dough is ready for baking. If the dough is still a bit sticky when you go to roll it out, just sprinkle on a little more flour. I like to actually use my hands to stretch the dough instead of rolling it, which helps with any sticking as well. But you’ll be surprise at how not sticky the dough is at this point.
Use the dough to bake up your pizza with your favorite toppings!
How to Bake Your Pizza
This dough can be used as a pretty generic pizza dough – so you can use it with any pizza recipe you want. (I’ve included some of my favorites below!!) If using another recipe, you can just follow the instructions from that recipe.
But if you want to just bake a basic pizza, topped with your toppings, this is how you would do it.
- Preheat the oven as hot as your oven will go. This will normally be between 450ºF and 500ºF. If your oven is not clean, it may smoke if you get it all the way up to 500ºF, so you may need to turn it down to 450ºF. If you are using a pizza stone, I like to heat the oven for at least 30 minutes. If you aren’t, then just heating it up to your desired temperature will work.
- While the oven is preheating, take one of your pizza dough balls and stretch it or roll it out. I go as big as my pizza stone, so about 14-16″ in diameter. Like I mentioned above, I like to use parchment paper, because it makes transferring the dough to the oven so much easier.
- Spread the dough with your desired toppings.
- Transfer the pizza to the preheated oven and bake until the crust is brown and the cheese is melted. This is usually about 10 minutes for me, but keep an eye on it, because the thickness of your dough, the temperature of your oven, and the amount of toppings on your pizza can all change this.
- Remove from the oven and slice into pieces.
**Note: some people like to bake the crust without toppings for a few minutes first, then remove and top before returning the pizza to the oven. If you like an extra crispy crust, this is what you’ll want to do.

Frequently Asked Questions
No! Many people have made this with just a bowl and spoon. It will take a little bit of muscle, but is totally doable. I wouldn’t suggest using a hand mixer – if you don’t have a stand mixer, just mix it by hand.
Yes! I like vegetable oil because the flavor is very neutral, but feel free to sub in olive oil for the vegetable oil.
Yes! This dough freezes very well. I like to freeze it in individual balls and then take them out one at a time to use. I just let it defrost in the refrigerator.
The one reason I don’t like to use weight measurements for this recipe is that external circumstances can always change how much flour you’ll need. I’ve made this recipe many, many times, and the amount of flour I use is never the same. Sometimes I’ll use the full 6 cups of flour, and sometimes it’s as much as a half a cup less. I think going by texture gives you the best results.
That being said, I had a wonderful reader named Steve who emailed me after he figured out the weight equivalents. So I will list his weights here:
590 g water @ 85 degrees
50 g sugar
9 g yeast (3 teaspoons) (not really necessary to convert this is it is a small number)
54 g of vegetable oil
12 g of salt
720 g of flour
I don’t! I just mix it until it is well mixed. I haven’t noticed a difference if I knead it for longer or just mix it up.
On this one, I say ALWAYS use common sense, and keep an eye on your pizza. The parchment paper that I use doesn’t have a temperature warning on it, but it does get brown while baking. If I was baking this longer than 10-15 minutes, I would opt to not use the parchment paper at such a high temperature.
Pizza Dough Video:
You’ve got the dough – here are some of my favorite pizza recipes
Breakfast Pizza
Chicken Bacon Ranch Pizza
Teriyaki Chicken Pizza
Buffalo Chicken Pizza
BBQ Chicken Pizza
Antipasto Pizza
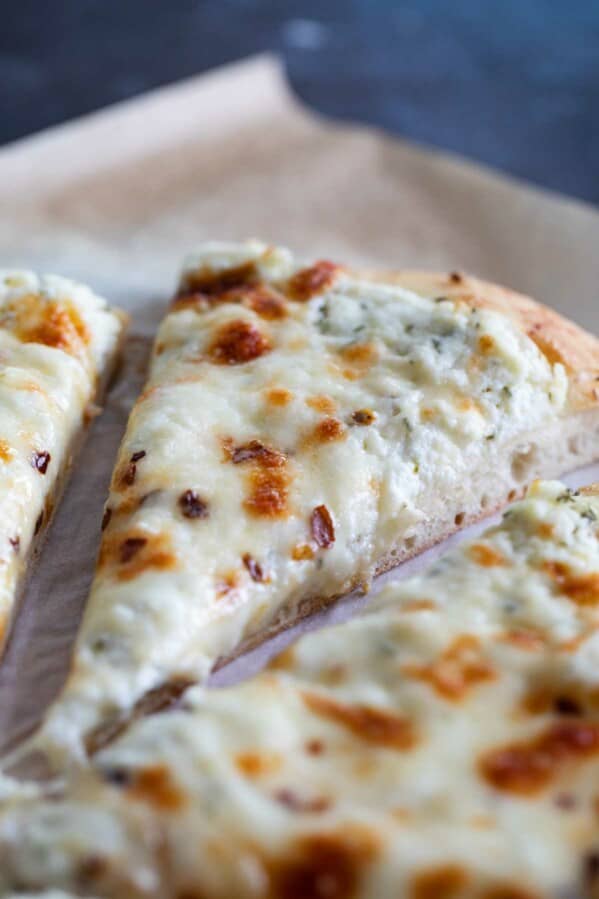
White Pizza
Tools Used to Make this Homemade Pizza Dough
I use a bench scraper to cut the dough and to clean the flour off the counter. I love it!
I highly recommend a pizza stone for baking your pizza. It really makes a big difference in the final pizza!
LOOKING FOR MORE FREE RECIPES?
Subscribe to my free recipe newsletter to get new family friendly recipes in your inbox each week! Find me sharing more family-friendly inspiration on Pinterest, Facebook, and Instagram.
Homemade Pizza Dough Recipe
Ingredients
- 2 1/2 cups warm water
- 1/4 cup sugar
- 3 teaspoons instant yeast
- 1/4 cup vegetable oil (can use olive oil or another oil, such as avocado)
- 6 cups all-purpose flour
- 2 teaspoons salt
Instructions
- In the bowl of a stand mixer, combine the water, sugar and yeast. Allow the mixture to sit for a few minutes until frothy. Add in the vegetable oil.2 1/2 cups warm water, 1/4 cup sugar, 3 teaspoons instant yeast, 1/4 cup vegetable oil
- In a bowl, combine the flour and the salt. Add the flour to the yeast mixture, 1/2 cup at a time, mixing well between additions. Continue adding the flour until the dough can be pulled away from the sides of the bowl with a spatula, but the dough will still be quite sticky. You may need to add in a little bit more or less flour, but the key is to remember that the dough will still be sticky and will stick to your fingers when you try to pull it apart.6 cups all-purpose flour, 2 teaspoons salt
- Grease a large bowl, then scrape the dough into the bowl. Turn the dough to coat it in oil. Cover the bowl with plastic wrap or a towel and a let the dough rise at room temperature until doubled, about 1 hour.
- Turn the dough out onto a well-floured work surface. Pull the dough around to the bottom, stretching it to create a smooth ball. Cut the dough into 3 equal portions. Each ball will be approximately 1 pound of dough.
- Roll out the dough to use in your favorite pizza recipe, or refrigerate until needed. (I have refrigerated it for several hours, up to overnight, but the dough will continue to rise, even in the refrigerator, so I try to use it before 24 hours.
- To bake, preheat a pizza stone in the oven as hot as you can go for at least 30 minutes. (I usually go between 475ºF and 500ºF.)
- Prepare your pizza with your desired toppings and bake until the crust is golden, 8-10 minutes.



Nadeen says
Trying this tonight!!! Can’t wait!! Thank you for your post. Do you think it is better to use warm milk over warm water and also I heard using an egg will make it better is this true thanks in advance!
Deborah says
I have never tried either, so I couldn’t say for sure, but please let me know how it turns out!
Kerrie de Manincor says
Made your Homemade Pizza Dough and it was the best pizza I have ever had! Your tip for using baking paper on the pizza stone worked like magic. I have always struggled to get a crispy base on my pizzas, not with your recipe.
Thank you!!
Venus Wilding says
I’ve tried so many dough recipes throughout the years. First Time I’d heard to leave the dough sticky. I’ve also read concerning yeast…to not use a whole lot. So these two concepts were new to me so decided to try “something new”. I can see why you’ve made this recipe over a hundred times (the author of this page). My favorite thing about the dough is it was so smooth and easy to roll out. The dough didn’t fight ya!!! I like a thin pizza over a thick so the dough rolling out easily thin made me smile!!! Perfect for children making their own!!
Linda says
This is the best dough ever! I make it every time and it turns out perfect. Thank you so much!
Steve Fisher says
Recipe is super easy to follow and make. However, I made 2 batches, one by weight and one my measurements. The weights are off somehow….the batch I made by weight was super wet and I ended up having to add almost another full cup of flour to get it close to right. The recipe by measurement was spot on with no adjustments
Mark M. says
Hi, I was wondering if you or anyone else has tried this recipe with reduced yeast, balled the dough and left in the fridge overnight.
I’m concerned it will over-rise in the fridge. Thanks!
Sheri Amaral says
I have tried MANY pizza dough recipes over the years and this is by far the best I have ever tried. My whole family loves it and says it’s the best pizza dough I have ever made. Simple to make and absolutely incredible!
Brittany says
Have you done this recipe with a cast iron skillet instead of a pizza stone?
Deborah says
I haven’t personally tried it, but I’m guessing it would be fabulous!
Aubrey says
Would it work to double this recipe?
Jgo says
Thank you for this delicious dough recipe. I even used leftover dough to make naan bread. I took out some of the dough out the fridge. Heated up a skillet and rub some oil all around. Add the butter garlic afte cooking. A1
Franklin Walker says
Very versatile dough we have used this recipe several times we have made pizza’s,cinnamon sticks, calzones and Stromboli’s with this recipe all were perfect
Charity Rice says
Haven’t baked yet but had a question. If you prepare the pizza on top of the stone since I don’t have a peel, would I still preheat the stone?
Deborah says
The stone won’t work as well if you don’t preheat the stone, but you don’t want to preheat the stone with your pizza on it. If you don’t have a peel, I would suggest using the backside of a baking sheet as the peel to transfer the dough to the hot stone.
John Velasquez says
My family and I loves this recipe. Thank you for sharing.
Doug says
I tried your recipe. It is super easy to make and cooked up perfectly in the bbq on a pizza stone. Definitely will be my ‘go to’ when I am making pizza.
Laura Cooke says
This is by far the best recipe I’ve tried! A true family favourite, even to extended family! I don’t use all of the flour, so adapted it slightly and ad herbs and garlic powder too, which really ads a lovely flavour. Thanks for the recipe!
Harry Brown says
This is the best recipe I have found for pizza dough. It was “wet” but it was nearly perfect.
Next time I will use parchment paper to transfer the rolled out dough to a hot baking stone.
I bake sour dough bread, using natural gas, in a dutch oven, starting at 500F down to 450F, on parchment paper, for 30-40 minutes. As you said, it might turn brown, but it is safe. I would not use parchment paper in a open fire oven.
thank you!